Scanning profiles
The scanning profile will be automatically selected based on the order placed, but it can be changed as necessary by clicking the drop-down menu
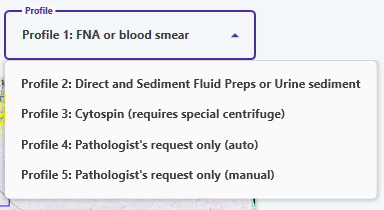
The vast majority of slides will be scanned on either Profile 1 or Profile 2
Profile 1 is for all FNA slides and blood smears
Profile 2 is for direct and sediment fluid preparations as well as urine sediment slides.
Profile 3 is for cyto spin preps only, which require a special cytocentrifuge to concentrate the fluid sample in a small area of the slide (most clinics do not have these).

Profile 4 and Profile 5 should only be used when specifically requested by a pathologist (when a re-scan is necessary).
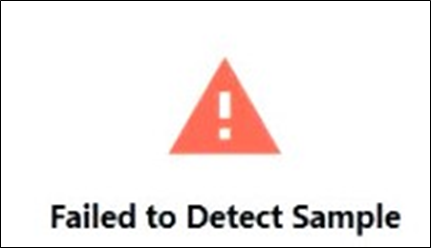
If the slide is of very low cellularity and the Failed to Detect Sample message appears, select Profile 2.
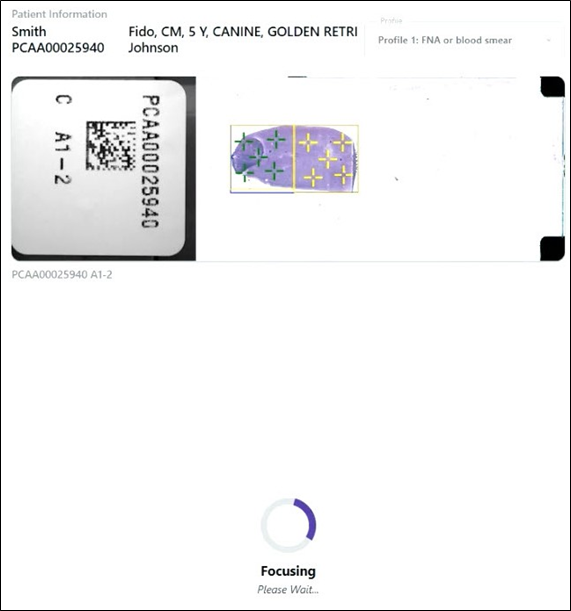
The tissue will be automatically detected and focus points (yellow crosses) will be placed on the tissue.
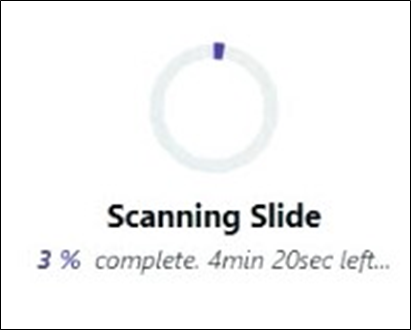
Click Start Scanning Slide.

Each focus point will be analyzed and will turn from yellow to green. A few focus points may turn red, but this is not a problem.
Once focusing has completed, scanning will begin and the estimated remaining time to scan will appear.
After the scan completes, click Unload Slide.
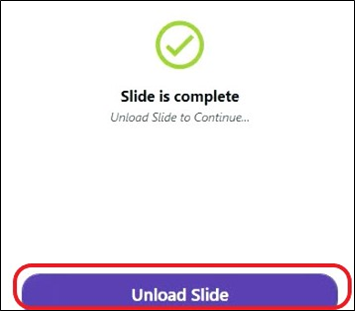
Wait for the slide to unload. A "Click" will be heard when the scanner door is unlocked and the slide can be removed.
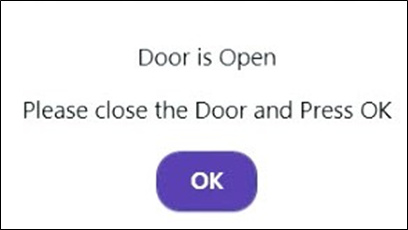
If the door is opened too quickly a dialog box will appear. Close the door and Press OK. The slide can then be removed.
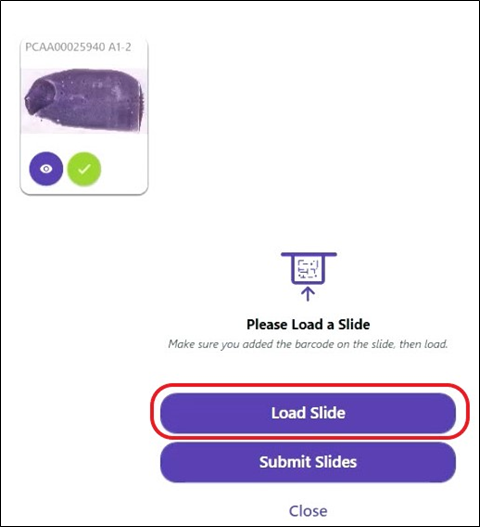
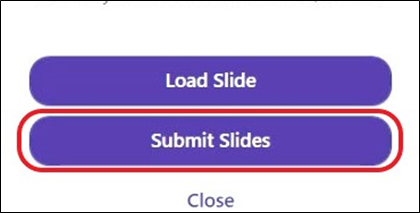
If there is an additional slide to be scanned, click Load Slide and follow the same scanning procedure.
As each slide finished scanning, the completed files will be shown.
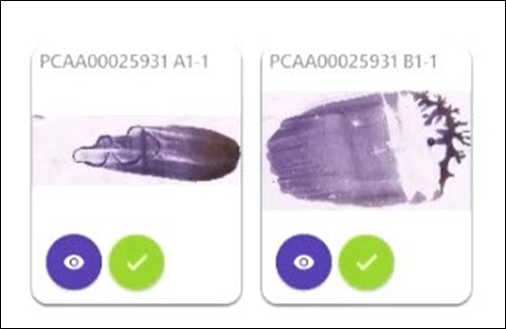
The images can be viewed prior to submission if desired (see Viewing An Image)
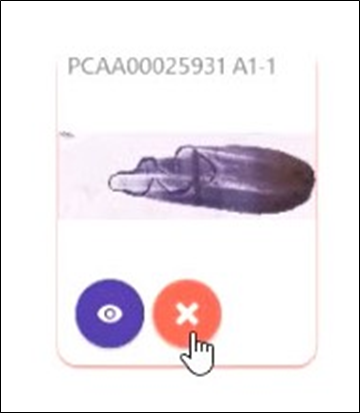
The green Check Marks indicate that the slides are accepted by the user as default. If a slide needs to be rejected (such as a mistake in slide selection or scanning the wrong slide for the current patient, click the green check mark to change it to a red X). This slide will not be submitted.
Once all ordered slides for the accession have been scanned in, click Submit Slides
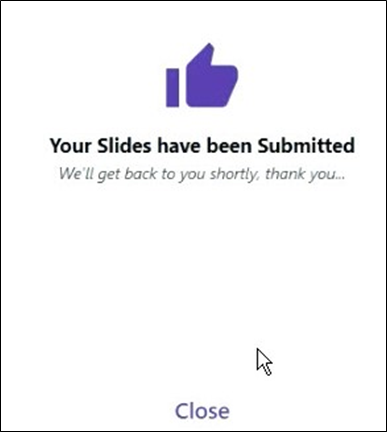
The successful submission message will appear. The slides will automatically upload to Antech and will then be assigned to a pathologist. A report will be received within 2 hours after the slides have uploaded to the Antech server. Click Close to return to the main dashboard.
If Submit Slides is clicked before all expected/ordered slides have been scanned, a message will appear prompting the user to contact customer service.
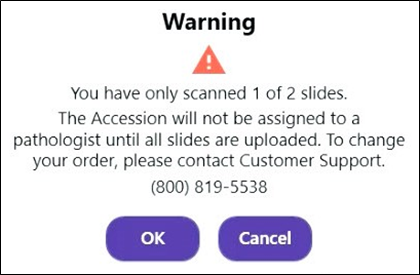
- Click Cancel to scan additional slides before submitting.