Tools
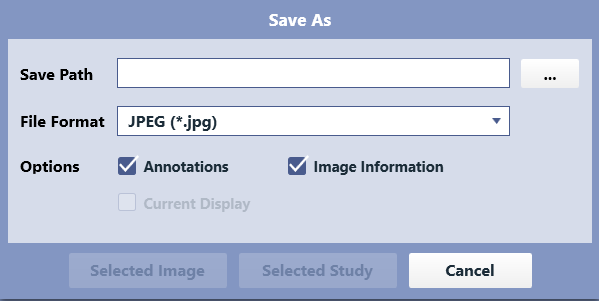
Save As

This tool allows you to save the image to a different file format.
Pressing the tool will open the Save As Dialog. Press the Browse button to specify a file path. Select the File Format you wish to save as. Optionally you can include Annotations and Image Information. If you wish to, you can select Current Display to Save the image as it is currently displayed on the screen. Press the Selected Image to save the currently selected image. Press the Selected Study to Save the currently selected Study. Pressing Cancel will close the dialog without saving the image.
Print

This tool allow you to send the selected image to a DICOM Printer.
Pressing the tools will open the Printer Manager Dialog.
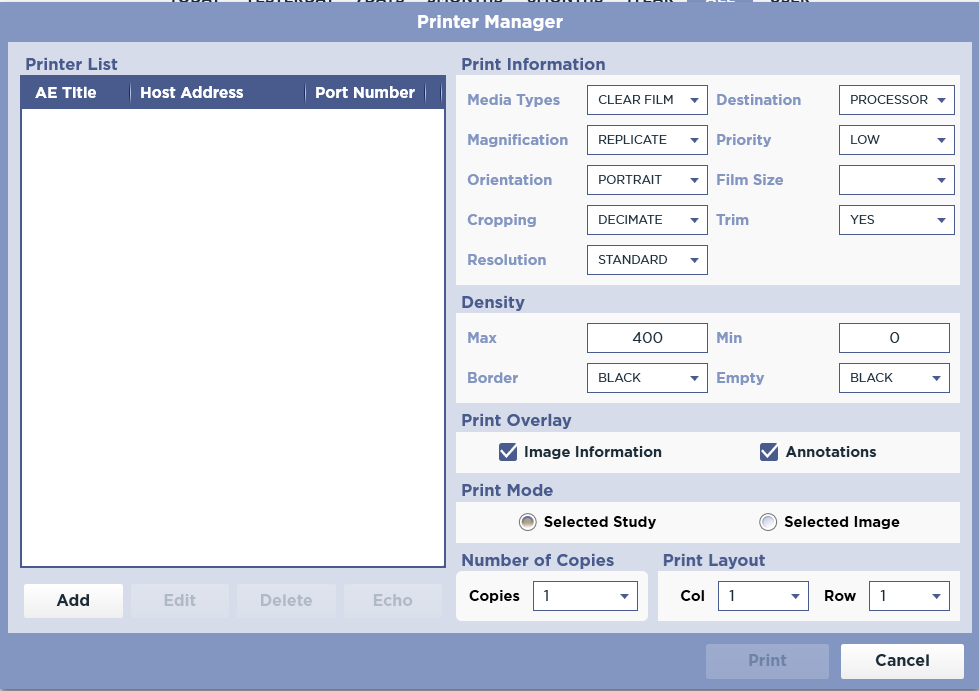
Here you can configure DICOM Printers. In the Printer List section, you can Add a new printer, Edit the selected printer, Delete the selected printer, and perform a C-ECHO to the selected printer.
The software limits the number of Printers to less than 20.
Configure the Printer Information, Density, Print Overlay, Number of Copies, and Print Layout.
Press the Print button to send the selected image to the selected printer.
Send

This tool allows you to send the selected Study or Image to a DICOM Server.
Pressing the Tool will open the Send Dialog.
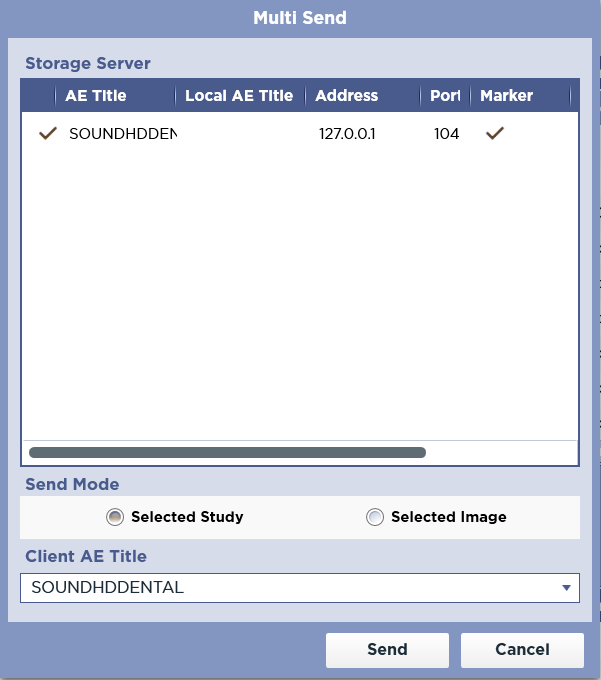
From here you can select which servers to send to. You can select multiple server. In addition, you can select to send all the images in the selected study or just the currently selected image.
Reset All

This tool allows you to restore the changes made to the image.
Pressing this Tool will reset image Rotation, Flip, Window Width, Window Center, and All Annotations.
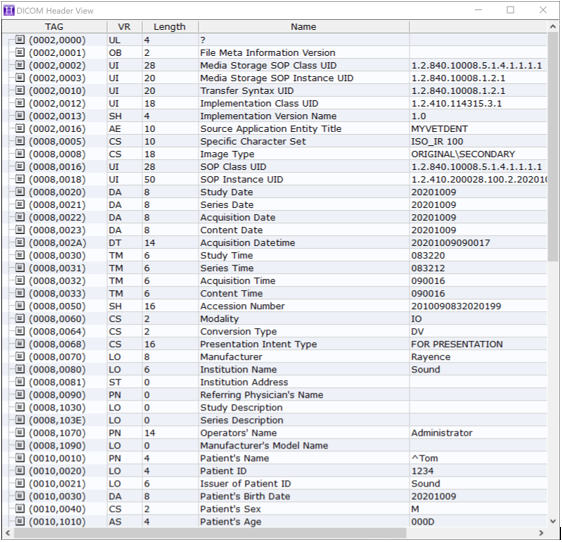
DICOM Header View

This tool allows you to view the information in the DICOM header for the current image.
Pressing the Tool will open the DICOM Header View. here you can see a list of DICOM tags and their associated values.
Report

The Report Tool allows you generate a report for the selected Image or Study.
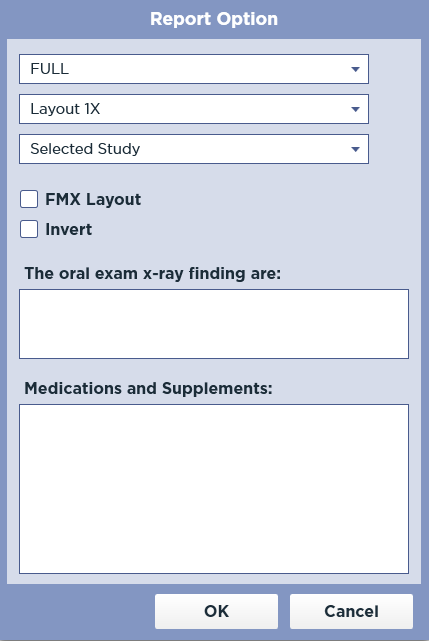
Choose your desired Layout and press Selected Study to generate a report and open it in the report viewer. Pressing Selected Image will generate a report for the selected image and open it in the report viewer. In addition you may choose to Invert the image(s) generated in the report. Pressing the Cancel button will close the Print Options dialog.
Press the Print button the print the report.
Non-DICOM Import

This tool allows you to import non-DICOM images into a study.
Pressing this button will show an open file dialog. Browse to the file you would like to import and select it. You can select multiple files. Press the Open button to import the images into the current Study.
Only JPEG and BMP images are supported.
Image Comments

This tool allows you to enter comments for the current image.
Pressing this tool will open the Image Comments Dialog.
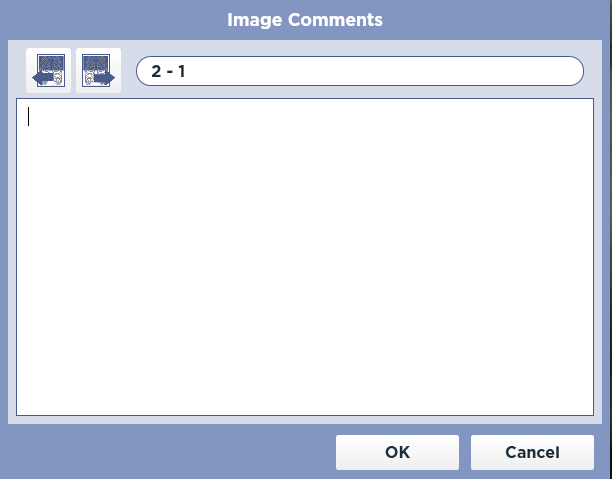
The Current Series and Image number are listed at the top of the Dialog.

Use the Previous And Next Image buttons to change the image you are commenting on.
Enter the Text of your comment in the field. Press OK to save your comments and close the dialog. Pressing Cancel will discard any changes you have made and close the dialog.