Shot Selection
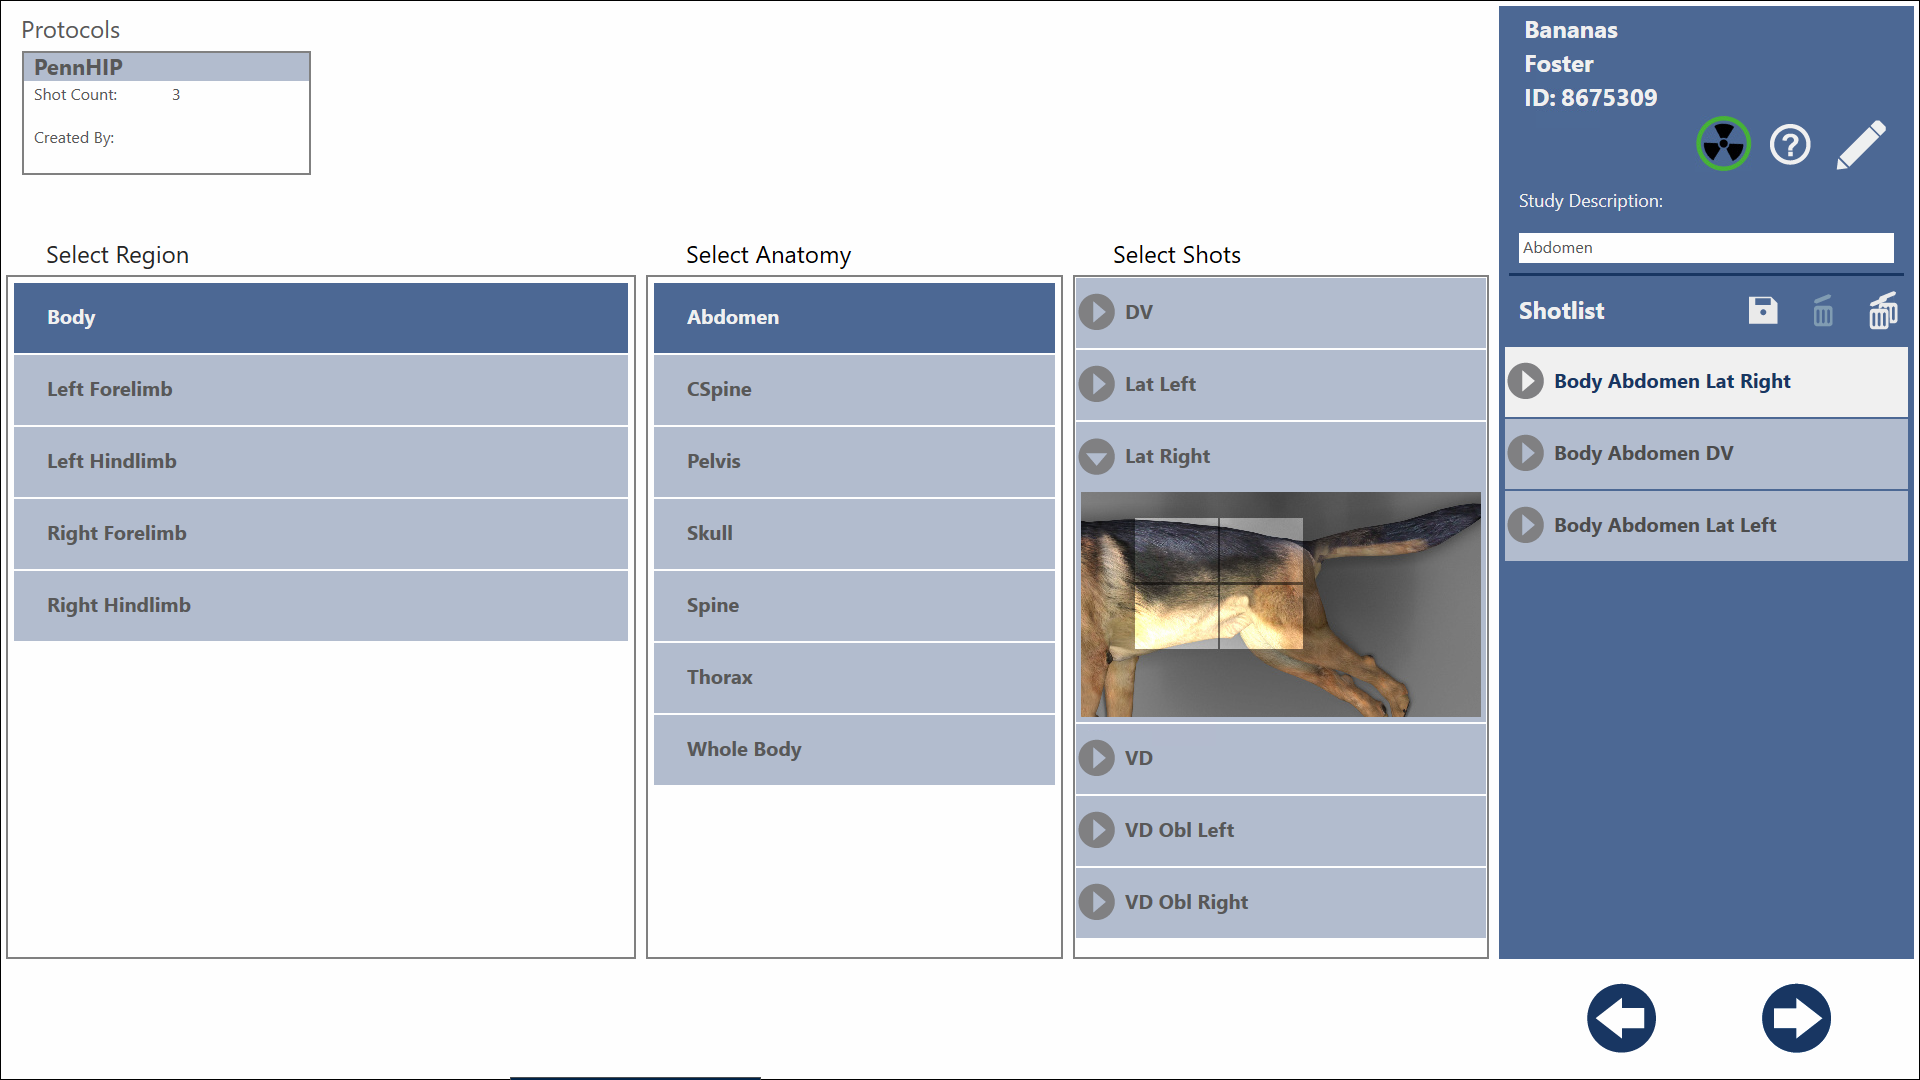
This is the Shot Selection Screen, where you'll build the shot list for your study. The patient's name and patient ID are displayed above the shot list on the side of the screen.
Building the Shot List
To build a shot list simply select the desired Region, Anatomy, and View. Repeat until you've added all the views you need for the patient.

If you find that you've added a shot in error just select it in the shot list and press the delete button to remove it.

If you'd like to start over, the icon with multiple trash cans on it will delete all added shots.
Shots that have already had their images acquired may not be deleted. The button will be disabled for those shots and the Delete All button will not delete them.
Once you've added all the shots you wish to acquire, press the Next button to move to the Acquire Review Screen where you can begin acquiring your images.

Pressing the Back Button will take you back to the Main Patient Screen.

Reordering the Shot list
To change the order of the shots, simply touch and hold on the desired view and drag it to the desired order in the shot list.
Protocols
Protocols are collections of shots that can be added to a study all at once. To add a protocol to the study just select the one you want to use and all the shots for that protocol will be added to your shot list.
Only protocols for the selected patient's species will be displayed. If you do not see the protocol you're looking for there may have been an error during patient entry, you can press the Edit Patient button to double check your patient information.
Default Protocols
SmartDR comes pre-installed with two protocols.
- PennHIP Protocol for Canine patients.
- Keenland Repositoy Protocol for Equine patients.
Custom Protocols
If the shot list you have created is frequently taken you can save the shot list as a Protocol. Just click or tap on the save icon located above the shot list to get started.

Then give it a name and press Save and you have a custom protocol!

A more advanced protocol editor is available in the Acq Profiles Section of the Settings Screen.
Position Assistant
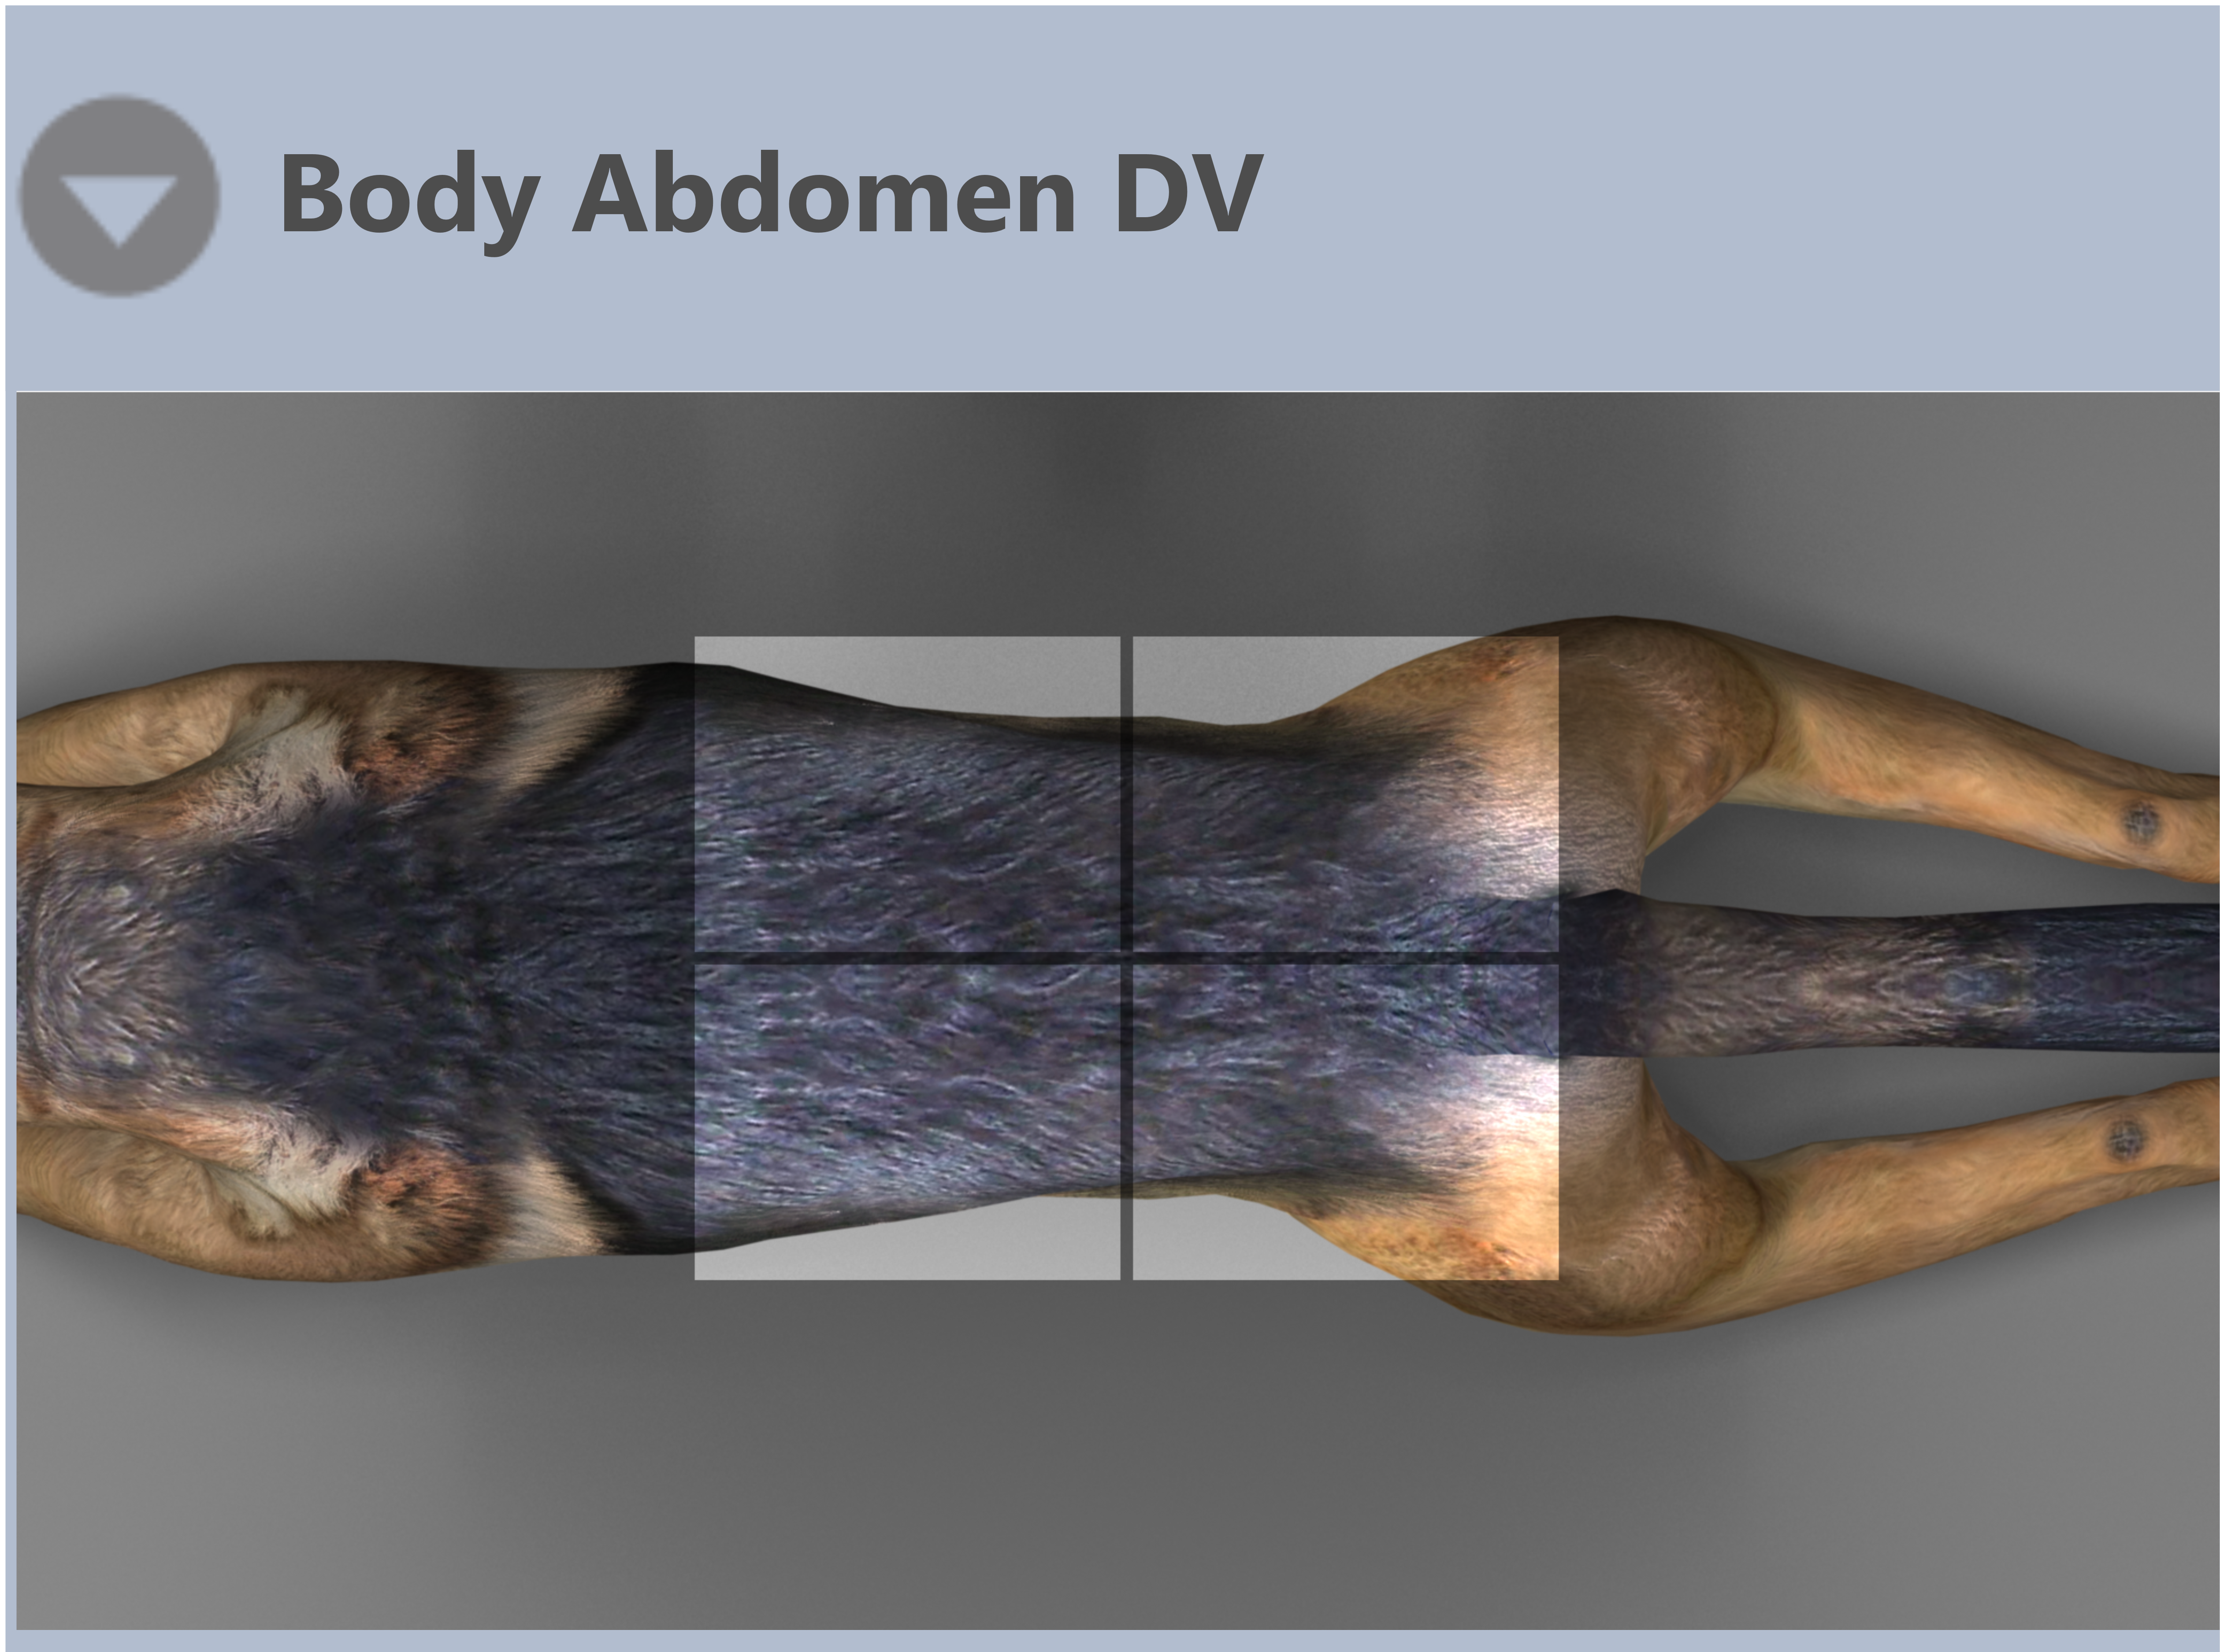
Many of the shots have a positioning assistant image like this one to help your newer technicians if they're still learning.

To view the image, click the Expand icon on the shot tile to see it. Pressing the same button again will collapse the positioning assistant.
Study Description
Here you can input a study description, if you don't provide one the software will automatically generate one for you.
If you have added a protocol to the shot list, the name of first protocol added will be used for the study description. If no protocols have been added, the Anatomy of the first shot in the shot list will be used for the study description.
The study description is used for the Study Description DICOM Tag (0008,1030) when the study is exported as DICOM.