Patients
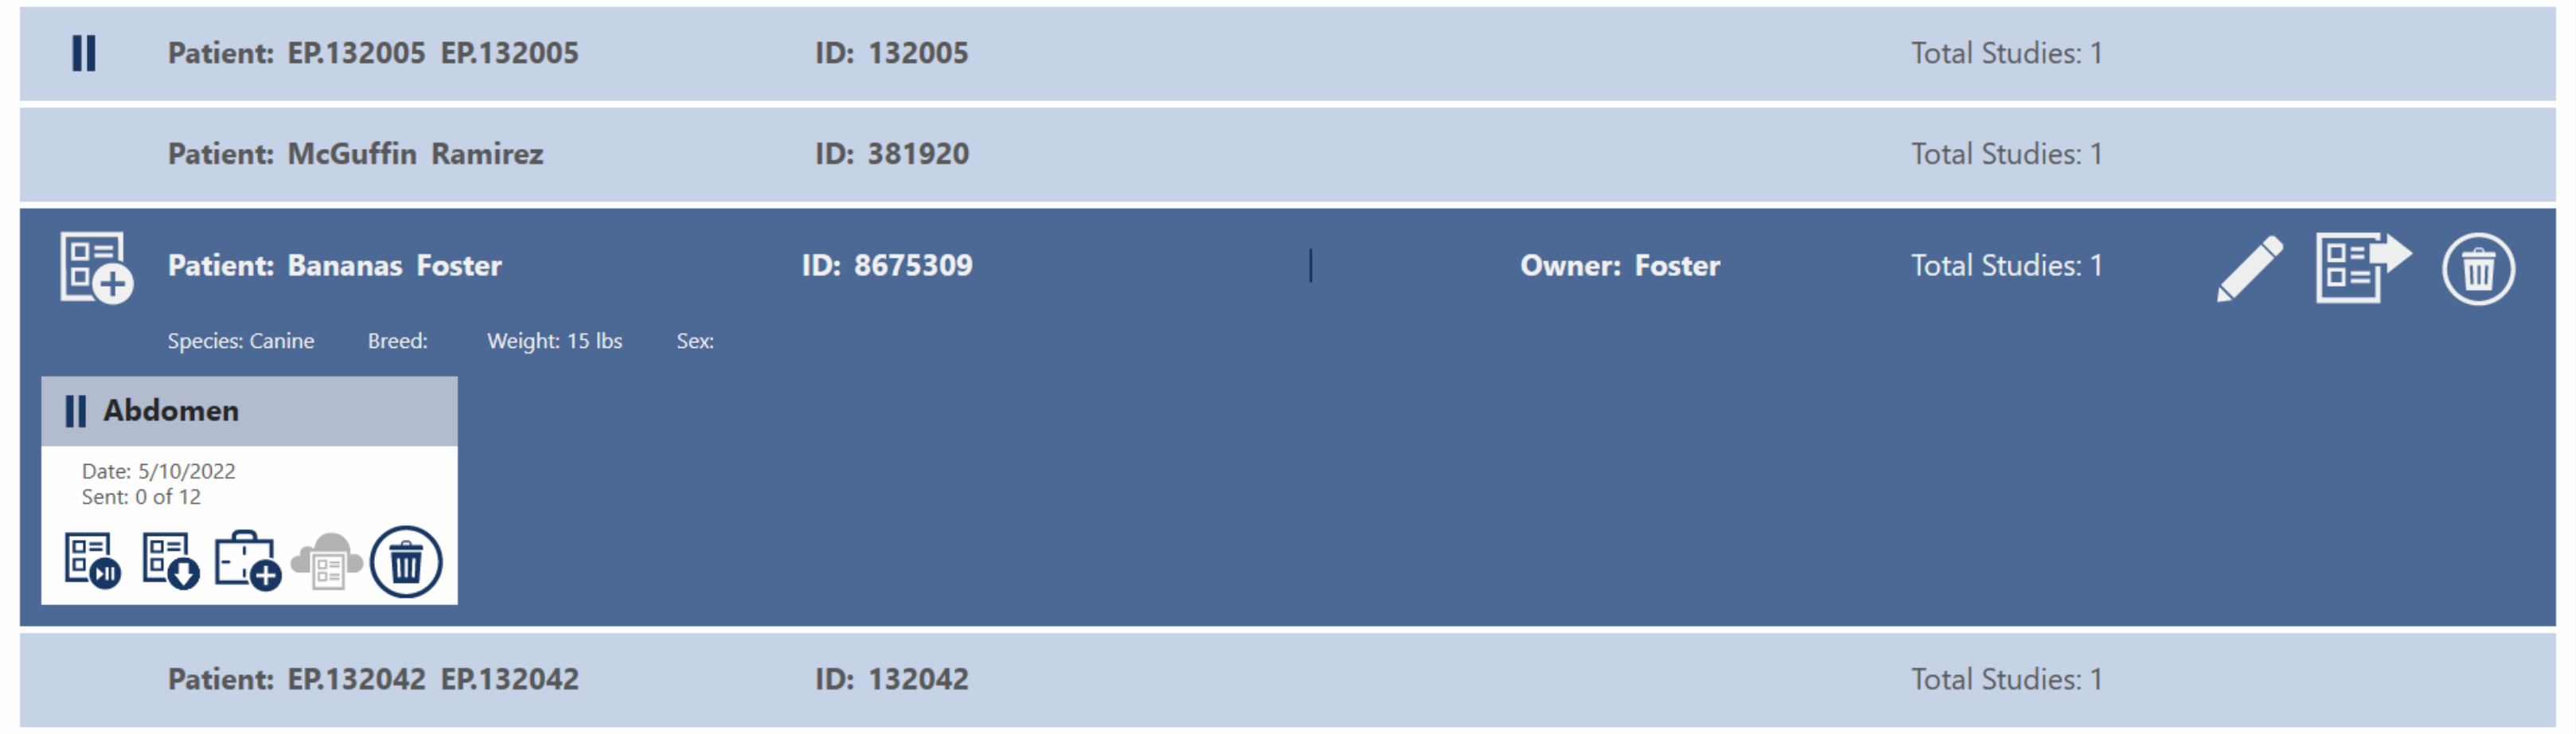
Each patient tile shows the patient's name, patient ID, owner's name, and the total number of studies for that patient. Patients can be expanded to show a list of studies by pressing on the patient tile. When expanded, you can also see the species, breed, weight, and sex of the patient. In addition there are four buttons that allow you to add a new study, edit the patient's information, export studies, or delete the patient.
Add Study

The add study button will open the add study form, or move right into the shot selection screen if you have the add study form disabled.
You can disable the add study form in the Basic Options tab of the settings screen.
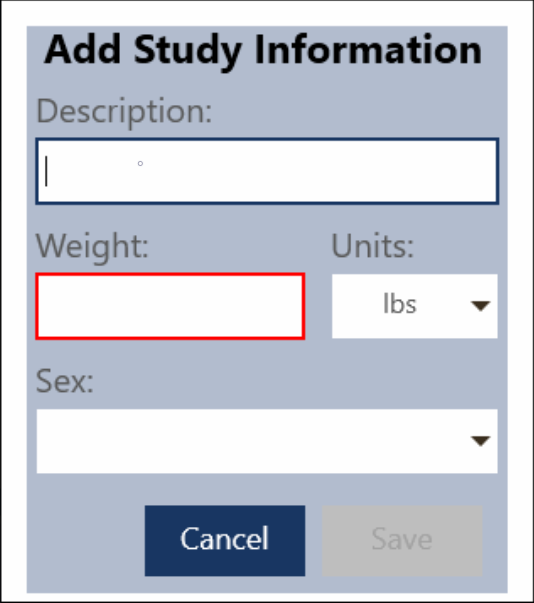
Patient weight is expected to change from visit to visit so it's a required field for a new study.
An accession number field can be added to the add study, add patient, and edit patient forms. This can be configured in the settings screen in the Advanced Options tab.
Edit Patient

You can edit patient information with the edit button, this will open the edit patient form, which is very similar to the create patient form. You can edit patient information such as names, breed, sex, etc. To save your changes, click the Save button or Cancel to discard your changes and return to the previous screen.
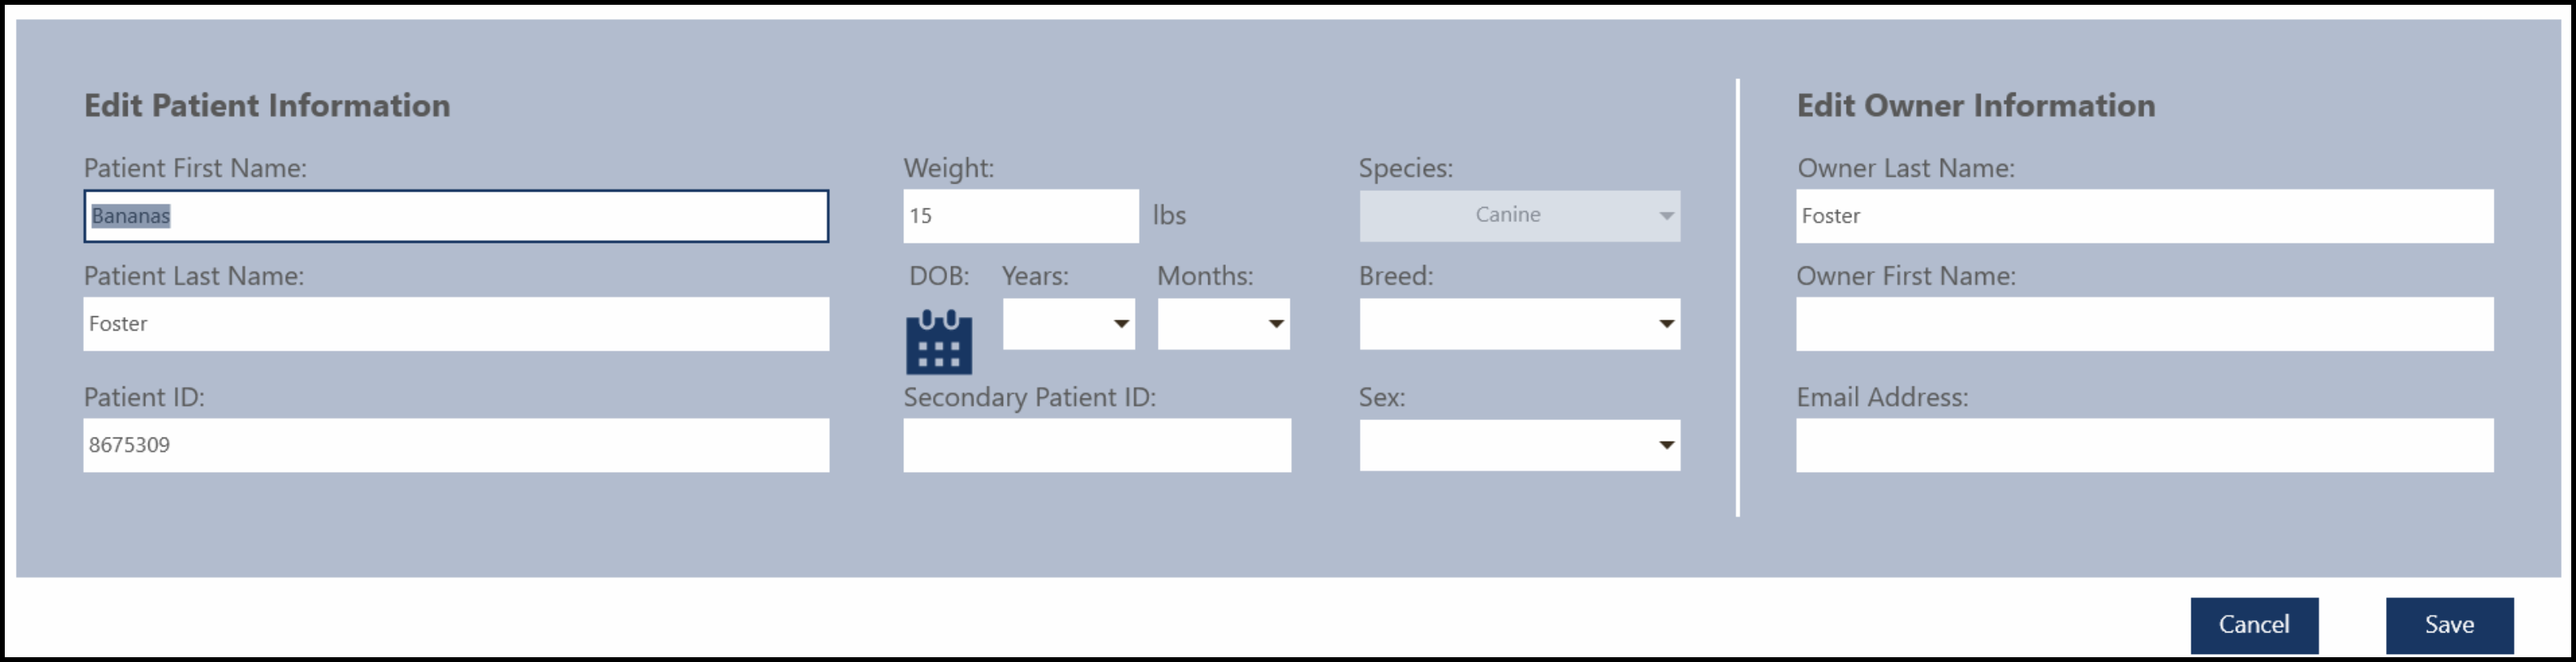
The Save button is only active if changes have been made.
Species cannot be edited once a patient has been created.
Export

The export button will open the export form. When no studies are selected all the selected patient's studies are exported. You can export specific studies by first selecting them, then pressing the export button.
There are two types of export. Network and Local. Local allows you to export the studies as either a DICOMDIR or JPEG.
You can close the form by pressing the X button.
The Network option is the default if you have a DICOM storage server configured. If there isn't one configured this form will default to Local and the Network tab will be disabled.
Network
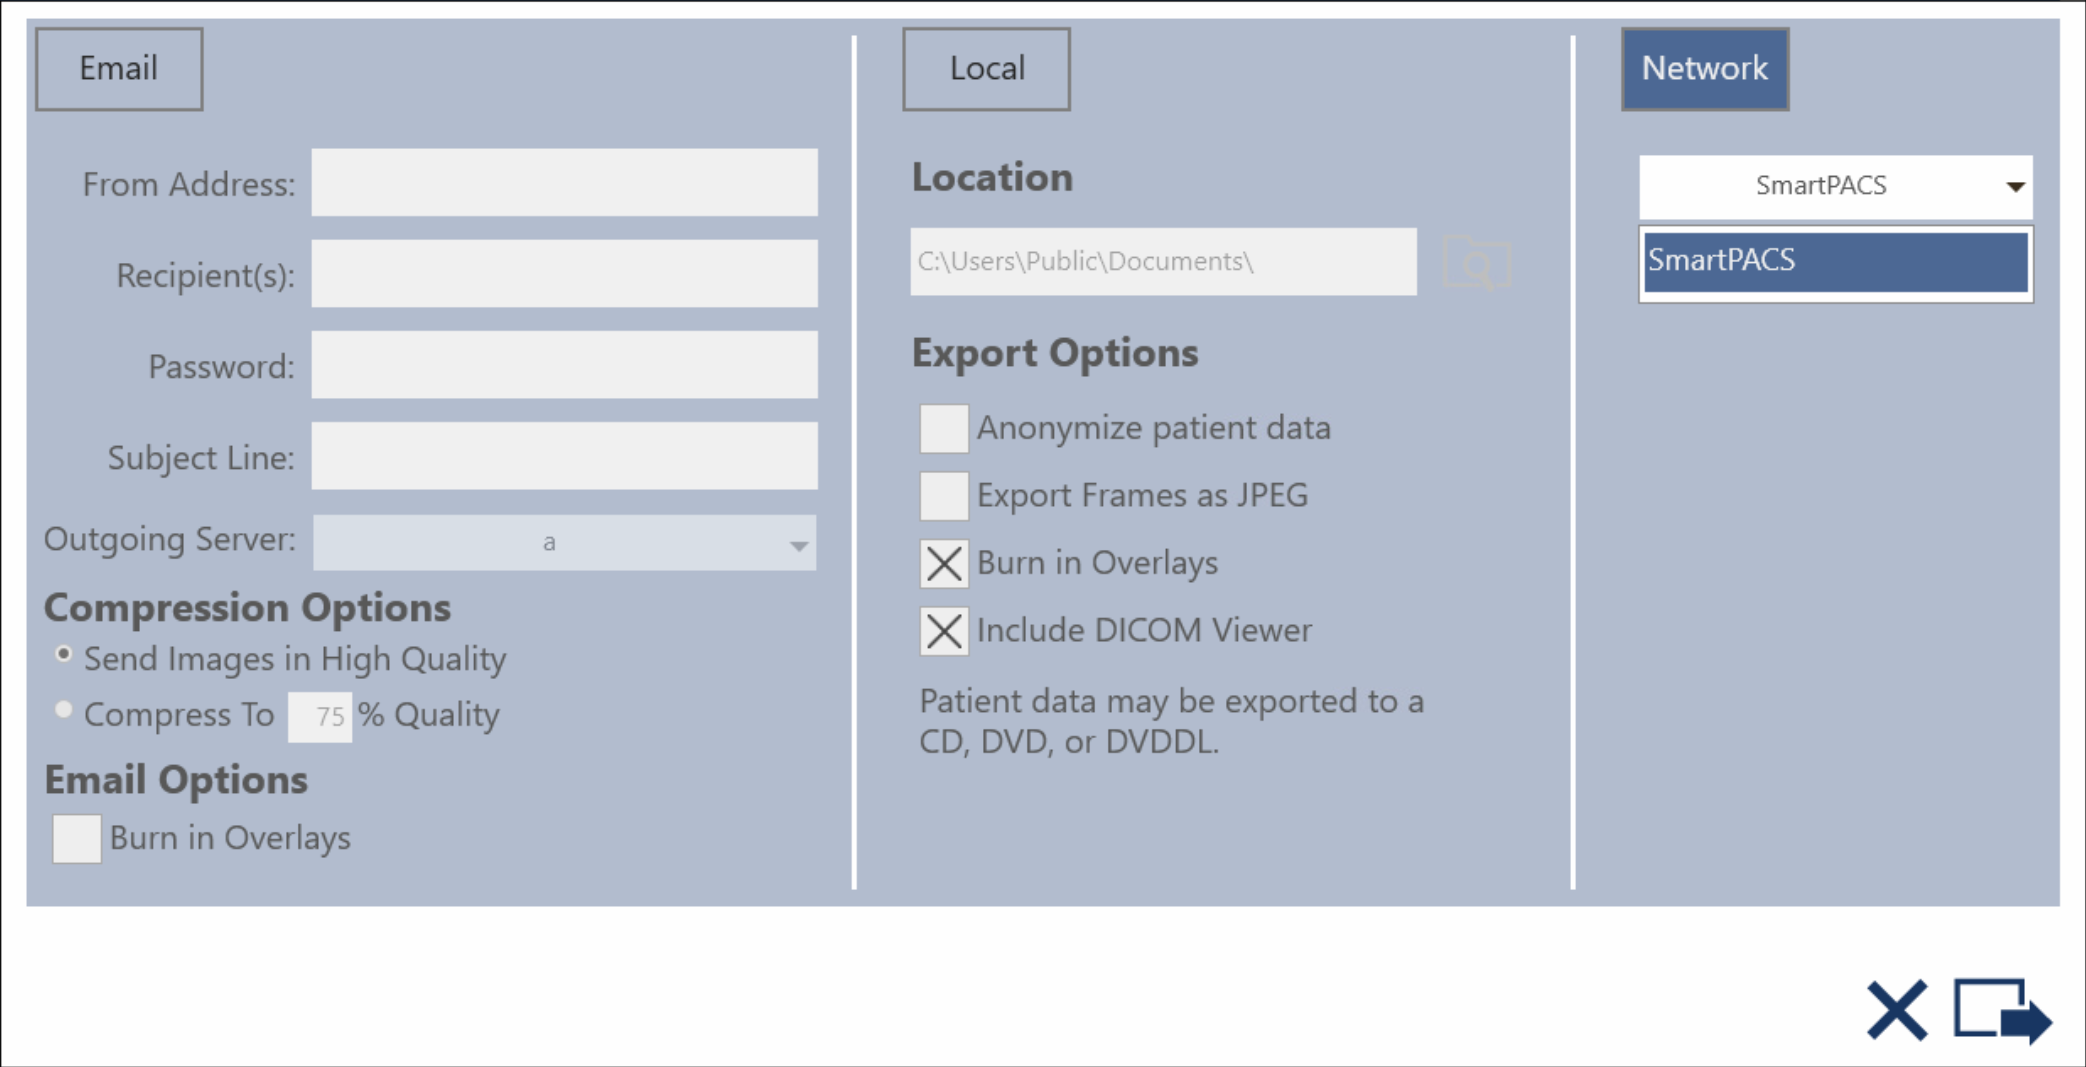
This allows you to send the studies to a DICOM server. DICOM storage servers can be configured in the Settings Screen.
Select a DICOM server from the drop down and press the Send button.
Local
You can select a location to export the studies to by browsing to the folder.
There are several options:
- Anonymize Patient Data
- This option will remove all identifying information from DICOM tags and overlays.
- Export Frames as JPEG
- This option will export the images as JPEG.
- Burn In Overlays
- This option will burn in overlays to the image.
- Include DICOM Viewer
- This option will include a portable DICOM viewer.
- This option is ignored if Export Frames as JPEG is selected.
Pressing the Send button will save each study to its own folder in the chosen location.
OFA submissions usually need to be in a JPEG format with certain information included in the image. You can visit the Overlay Editor to set up an OFA overlay to burn into your images when you export them as JPEG.
Delete

To delete a patient, press the Delete button.
This will delete all of the patient's studies and images. This cannot be undone.
Paused Studies

A patient with a paused or suspended study will have this icon next to it. If you expand the patient the suspended study will be noted with the same icon.
When you suspend a study the images are NOT archived. To send the images to your archival server you will need to re-open the study and finalize it, or you can send them manually.