Getting Started

Adding a patient begins in the top left corner of the screen. A routine entry begins with the Add Patient Button, but in an emergency, you can use the Emergency Patient Button to bypass patient entry and jump directly to shot selection.
Add a patient
To begin let's add a new patient by pressing the Add Patient button located in the upper left corner of the screen.

Simply fill out the required fields which are outlined in red.
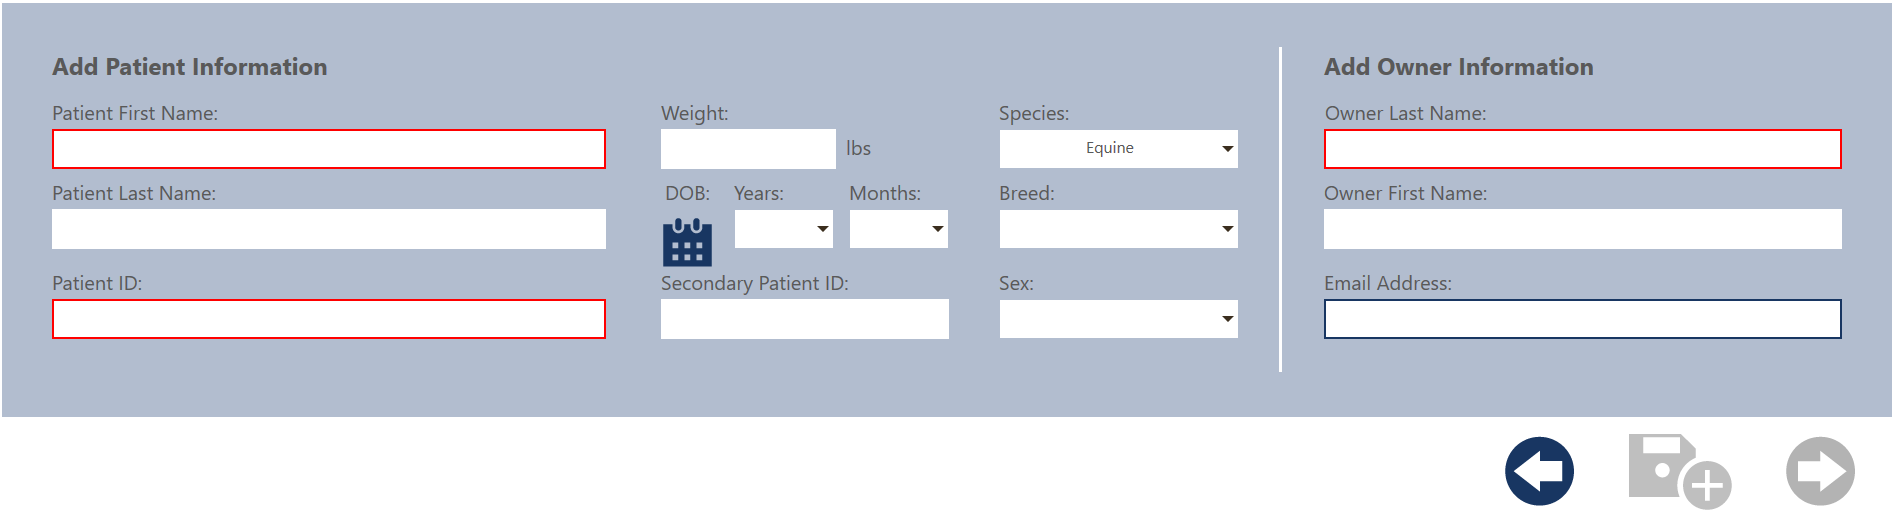
Once the required fields are filled in, the Next button will become active.

Press the Next button to continue.
Build a Shot list
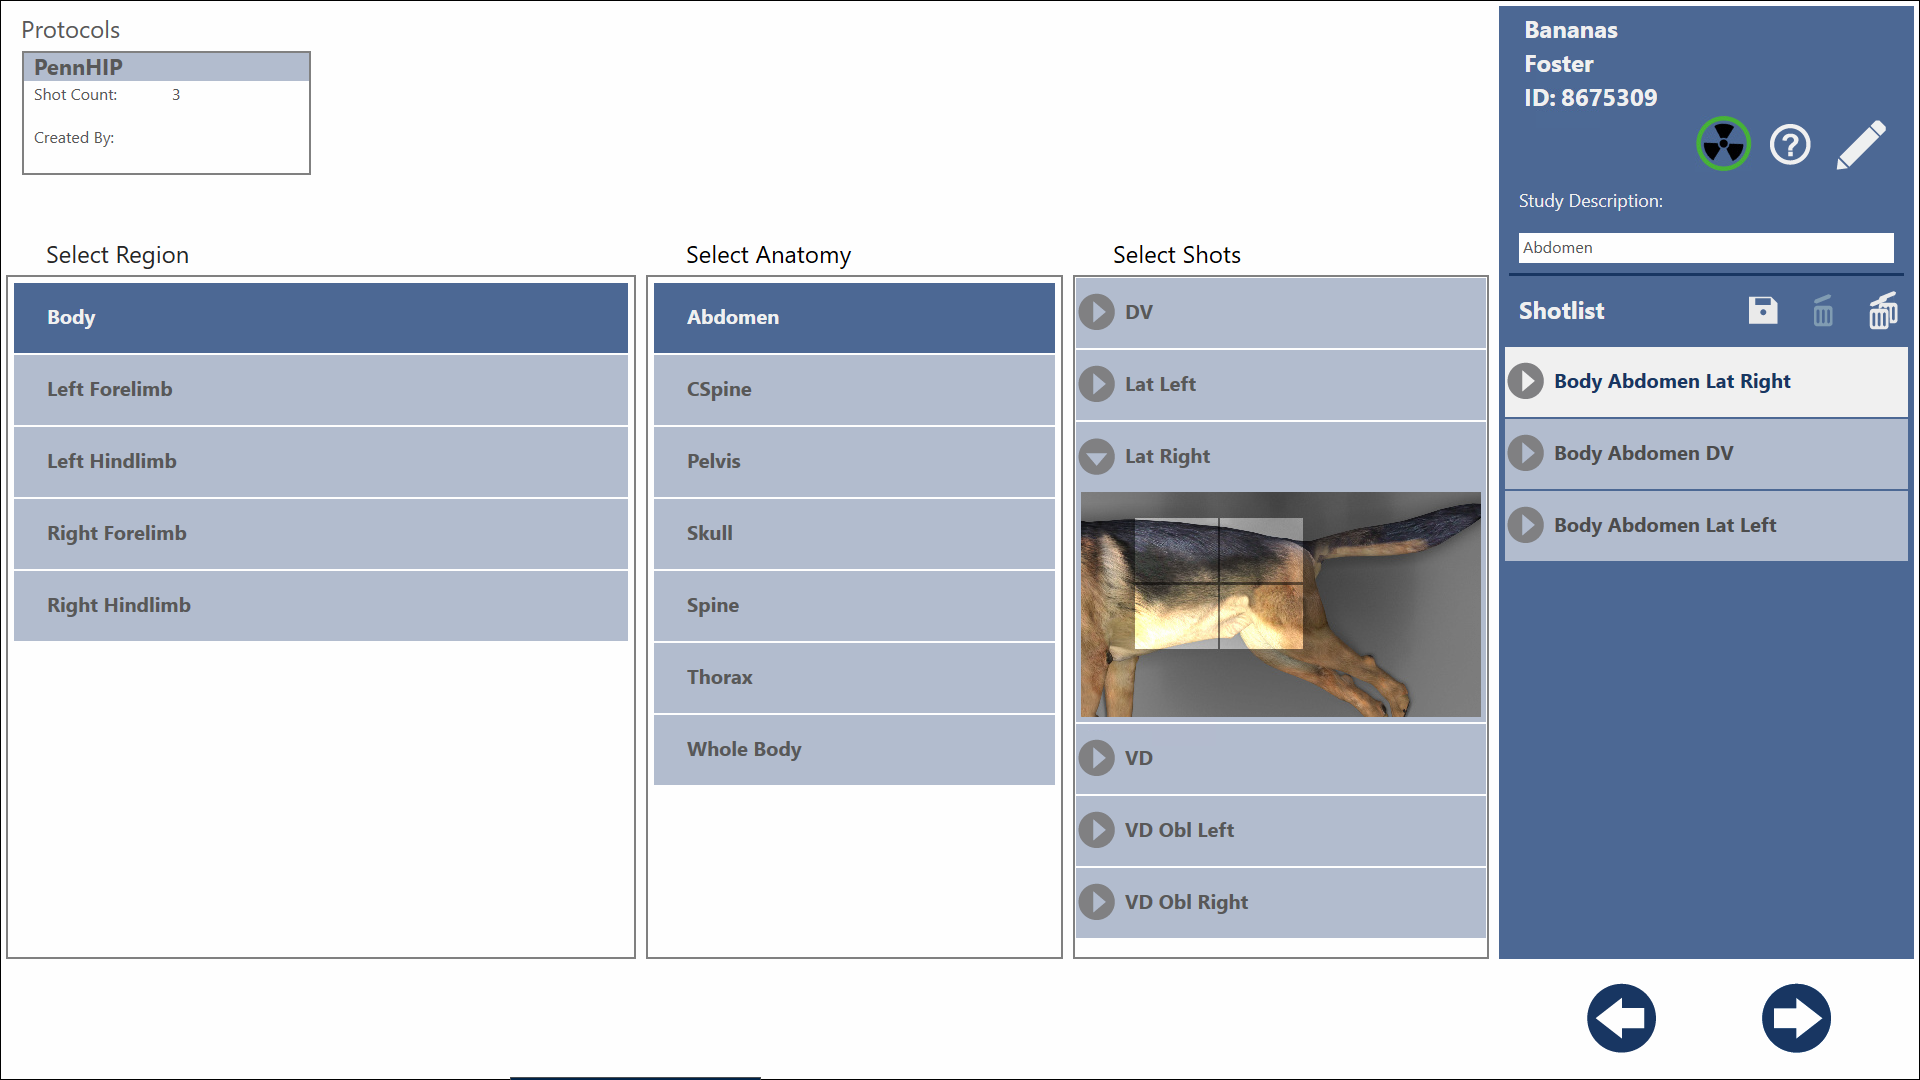
To build a shot list simply select the desired region and anatomy, then select your desired view or select a protocol that will contain a series of pre-selected shots. Continue adding views to the shot list until you have all of the desired views in the order that you would like.
To change the order of the views, simply touch and hold on the desired view and drag it to the desired order in the shot list.
By adding all of the desired views at once, you are no longer required to go back and forth to the acquisition software in between views, streamlining your work in the radiology suite.
If the shot list you have created is frequently taken, you can save the shot list as a Protocol by touching the Save icon located above the shot list.

Then just give it a name and press Save.

Acquiring an Image
When entering the Acquisition Screen, make sure to check the Panel Status icon in the top right.
A green icon means the Detector is connected and ready to acquire the radiograph.

A red icon means the Detector is not connected.
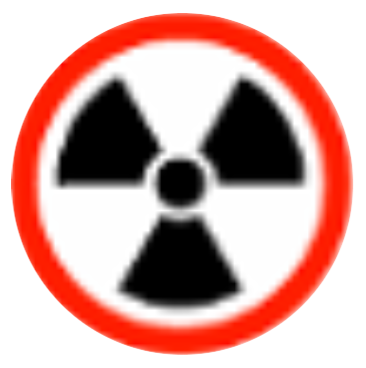
A pulsing green icon means that the Detector is asleep.
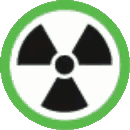
A spinning green icon means that the Detector is not yet ready.
When the Detector is ready, you'll hear an audible notification unless it's disabled in the System Settings.
To acquire an image press halfway down on the two-stage foot-pedal or hand switch provided at the time of installation. Once the pedal has been pressed halfway down, wait for the generator to signal that it has finished prepping. Once the generator has finished preparing to expose the Detector, press the rest of the way down on the two-stage foot pedal or hand switch to acquire the radiograph.
The Detector status indicator will begin to rotate, indicating a successful exposure.
The image will appear on the screen when the acquisition is finished.
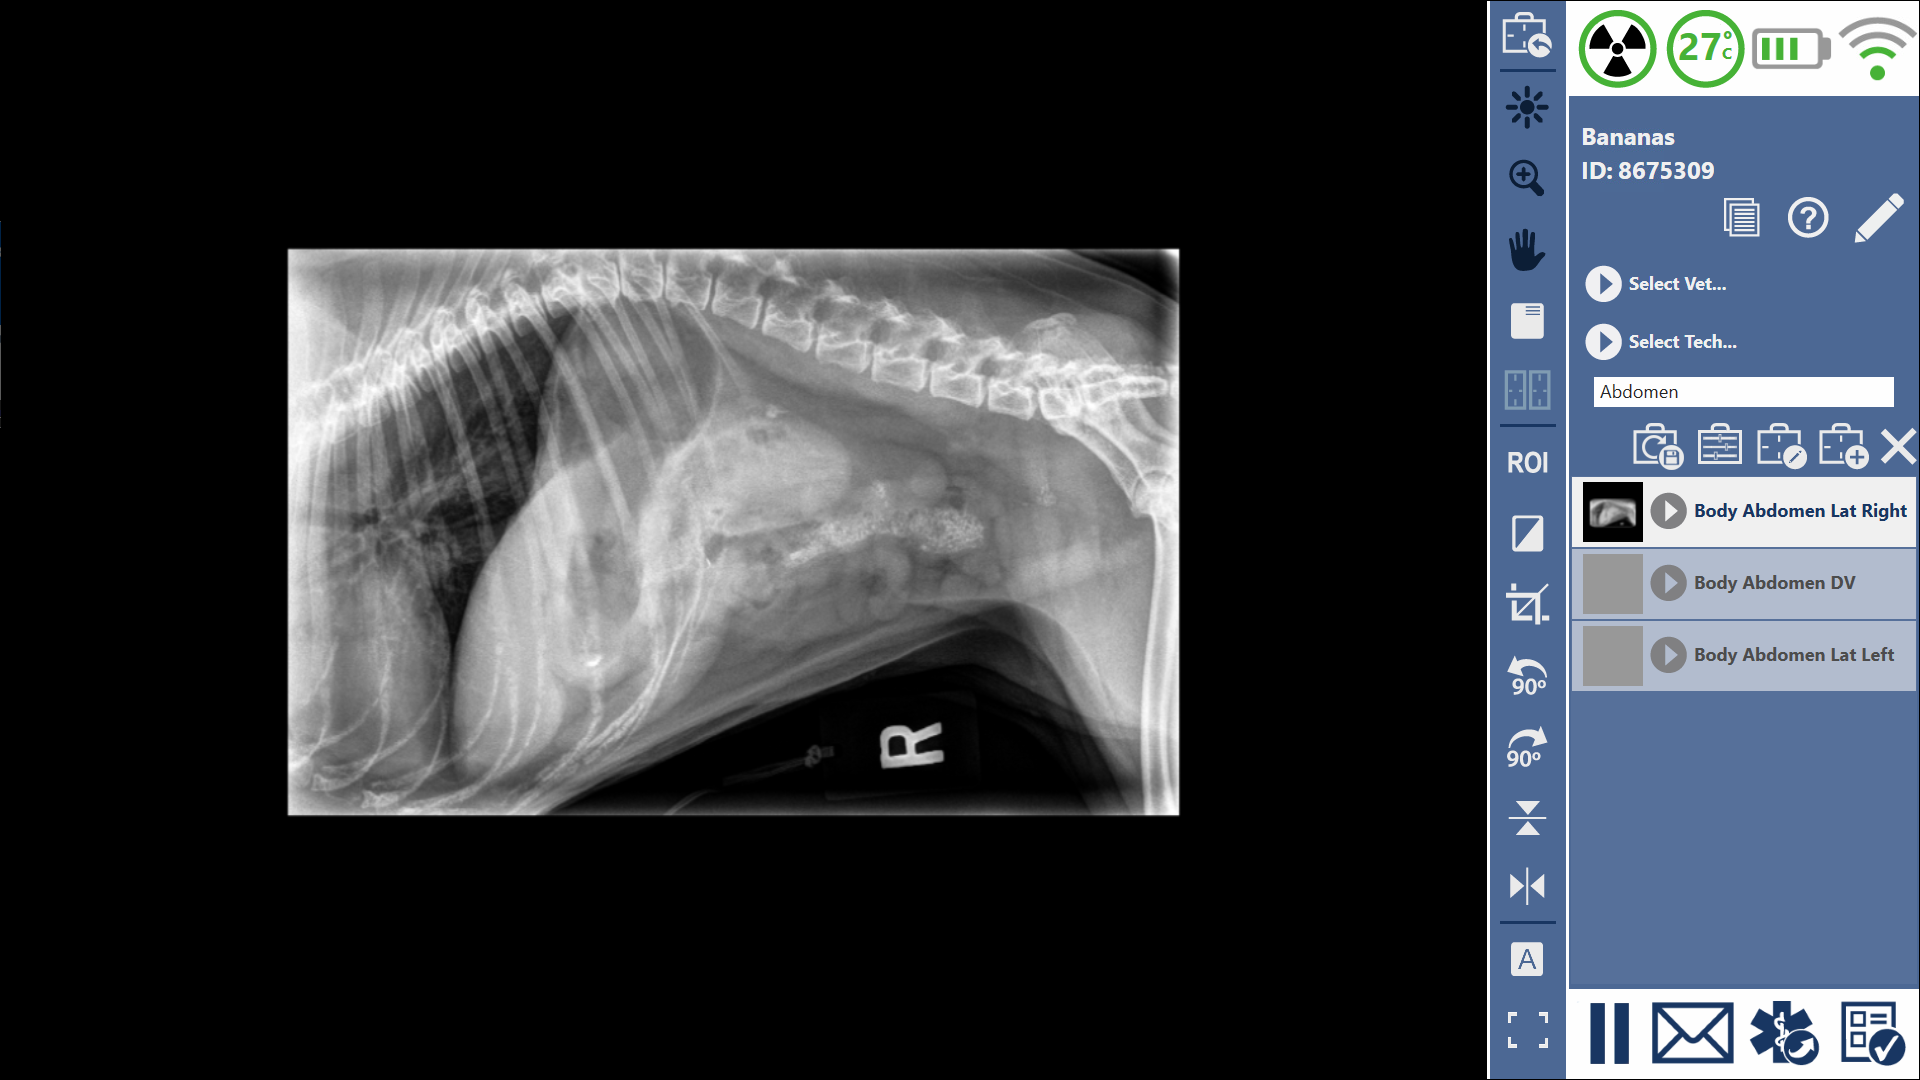
It's that simple. If the radiograph is acceptable, continue on to the next view. If there is motion or if the patient was not properly positioned, simply touch the reject button.

This button automatically rejects the image and sets up for the same view for a retake.
Continue acquiring radiographs until the shot list is complete. If additional views are required, touch the Add button.

When you're finished press end study at the bottom of the screen, automatically sending images to your DICOM Storage Server and returning you to the main patient list.

Help
If at any time you would like more information about a feature, just look for the help icon.

Icon Help will provide a label for the various icons on a given screen. Select the Training option to bring you to this training site. Last, but not least, Suggest a Feature will bring you to our User Voice section where you can submit or vote on ideas for future iterations of our products. Take a look, you can learn the entire system right here.

This is also a great way to teach new users. They can learn quickly through immersion.