Standard Capture Mode
Acquisition: Standard Capture Mode
1. Select Tooth Areas
Select tooth areas to be imaged in desired order by clicking on each area with the left mouse button.
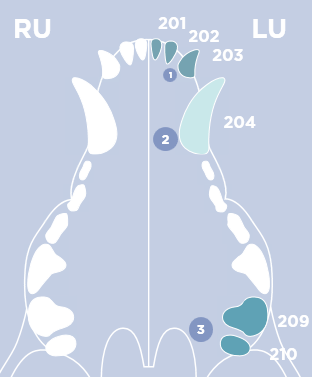
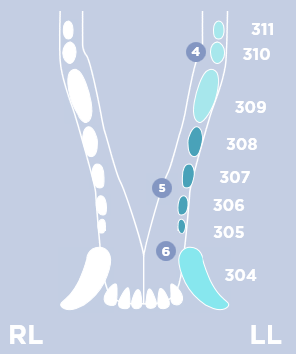
Tooth area may be unselected by clicking on the desired teeth again. Use the right mouse button to click to select and number label a specific tooth.
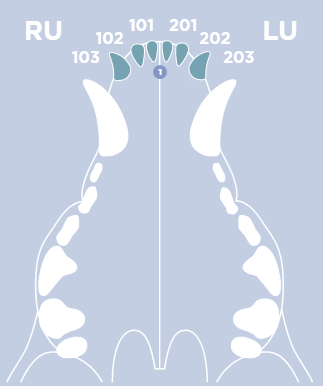
You can also right click on the quadrant label, such as “LU” for Left Upper quadrant, to select the entire quadrant. You may right click on a tooth to deselect that specific tooth.
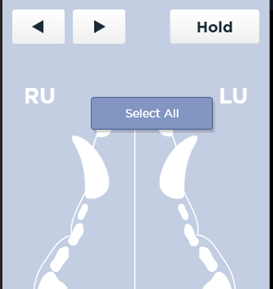
2. Click Start
Click Start and a blue “READY” indicator will illuminate when the sensor is ready. The first tooth area position to be imaged will be highlighted in yellow on the mouth graphic.


3. Acquire image
The Image will be enlarged on the main viewer screen and as a thumbnail at the top of the viewer screen. The next position location will be highlighted in yellow on the mouth graphic. Arrows may be used to skip ahead locations or go back.

- Click delete icon
 to retake or reject an image.
 - Multiple images may be taken within the same location if needed. To do so, click the Hold button before the first image is taken for your current position. Acquire as many images as you like in this location. Before you take your last image, click Hold again to disable this feature. After your last acquisition, the sensor will be ready for its next position on the mouth graphic.
- Click Stop to stop the study. Press Start to re-initialize the sensor to resume acquisition.
- Click Pause
 to suspend the study. Study will move to the Worklist to resume later.
 - Click Finish when study is completed. Study will move to the Studylist.
When an emergency acquisition is generated, the mouth graphic will default to canine. To change species if needed, click on the edit info icon  from the top left of the acquisition screen and select appropriate species.
You may rename a tooth or series of teeth in an image to their appropriate number post-acquisition.
- Right click the desired thumbnail at the top of the Acquisition or Viewer screen and choose “change tooth number”
- From the pop-up menu, select your tooth area from the drop-down menu.
- Select tooth number from the drop-down menu. To select multiple teeth, hold down the shift button on the keyboard and select.

- Press Ok. Your image will be renamed from the tooth name to its number(s).
