Profile Settings
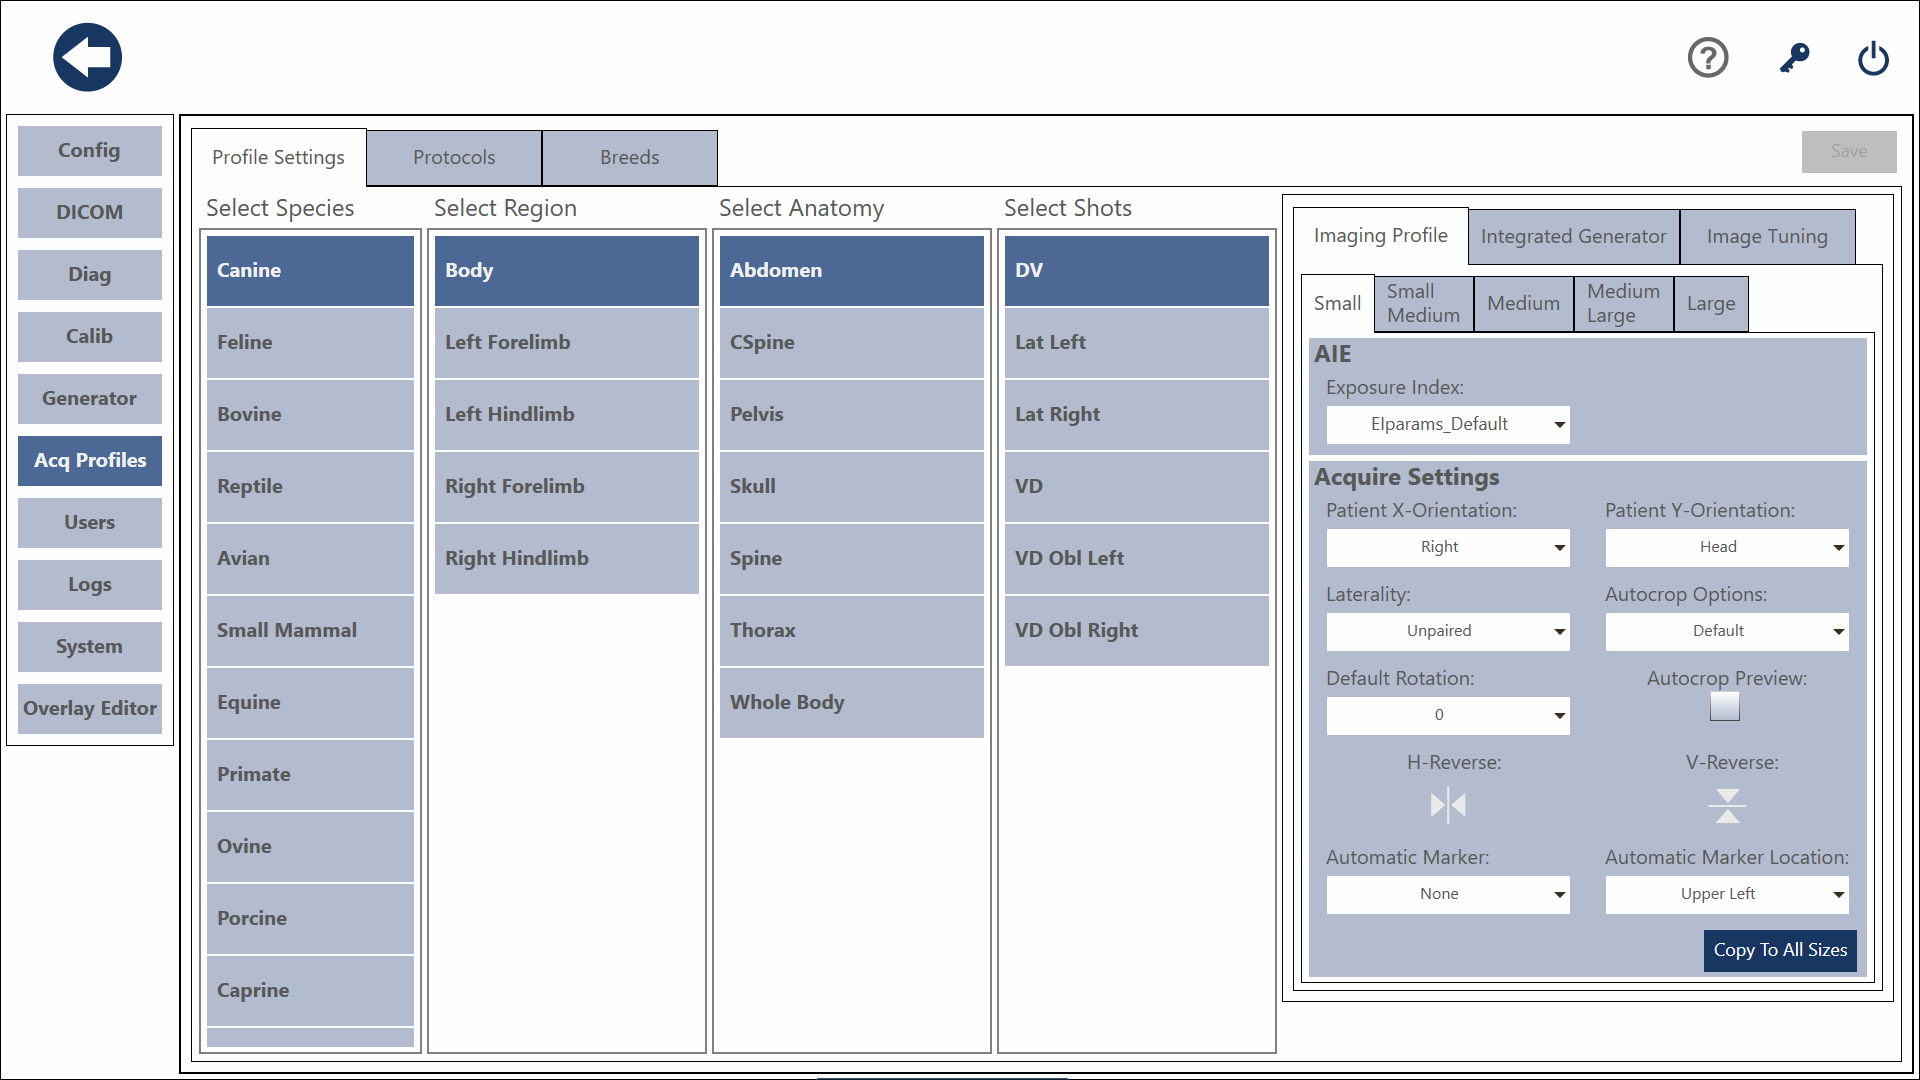
This is the Profile Settings. The settings for each shot in SmartDR can be manipulated here. For each shot, there are different settings depending on the Patient's weight. You can access the different settings by selecting the one you wish to view from the Patient Size combobox.
Patient Sizes
- Small : Less than 20 lbs (9.072 kgs).
- Small Medium : Greater than or equal to 20 lbs (9.072 kgs), less than 45 lbs (20.412 kgs).
- Medium: Greater than or equal to 45 lbs (20.412 kgs), less than 80 lbs (36.287 kgs).
- Medium Large: Greater than or equal to 80 lbs (36.287 kgs), less than 100 lbs (45.359 kgs).
- Large: Greater than or equal to 100 lbs (45.359 kgs).
Each Patient size has many different settings. They are broken up into three section. Imaging profile, Image Tuning, and Generator Settings. You can collapse or expand a section by clicking the expand button.
The Integrated Generator tab will only be visible if Generator Integration is properly configured within the software.
Image Profile
Patient X-Orientation
This is the position of the patient in the X-Direction of the x-ray table. It is used to generate the Patient Orientation (0020,0020) DICOM Tag.
Possible values:
- Anterior
- Posterior
- Left
- Right
- Head
- Foot
Patient Y-Orientation
This is the position of the patient in the Y-Direction of the x-ray table. It is used to generate the Patient Orientation (0020,0020) DICOM Tag.
Possible values:
- Anterior
- Posterior
- Left
- Right
- Head
- Foot
Laterality
This is the laterality of the body part being examined. This is what is used to populate the Image Laterality (0020,0062) DICOM Tag.
Possible values:
- Left
- Right
- Unpaired
- Both
Autocrop Options
When this option is set to True, the system will automatically crop the image when acquired for this shot. See the Acquire Review Screen section of this guide for more information.
Autocrop Preview
If this check box is checked, when an image is acquired for this shot, the system will display the image uncropped with a dashed line indicating the crop the system found. See the Acquire Review Screen section of this guide for more information.
Default Rotation
This option defines how the image is rotated when the system acquires and image for this shot. This is applied in addition to the Detector's Default Rotation set in the Detector Configuration.
H-Reverse
When this toggle button is active, when an image is acquired for this shot, the image will be Horizontally Flipped.
V-Reverse
When this toggle button is active, when an image is acquired for this shot, the image will be Vertically Flipped.
Copy to All Sizes
Pressing this button will copy the Image Profile settings for the current patient size to all other sizes.
Image Tuning
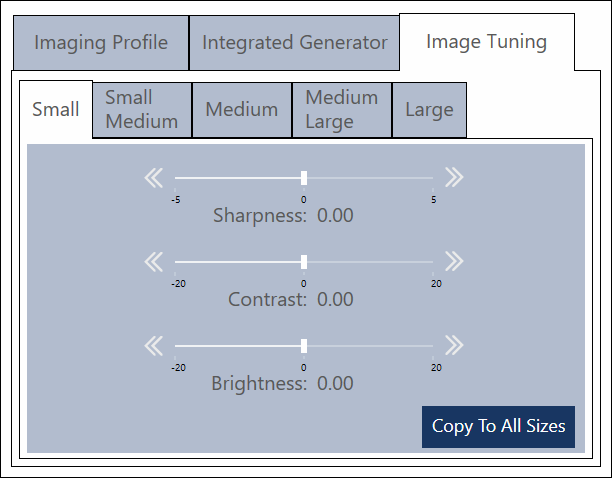
These are the Musica Image Processing tuning parameters. You can adjust Sharpness, Contrast, and Brightness. To adjust them by dragging the circle left and right or press the arrow buttons. To apply the same tuning parameters to all sizes, press the Copy to All Sizes button.
Generator Settings
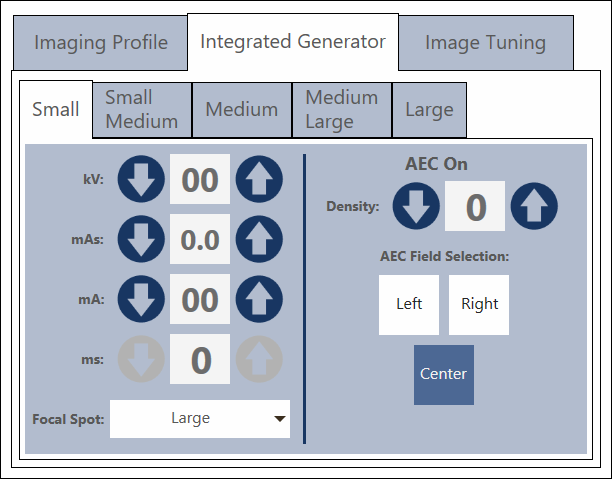
If an integrated generator is configured, the Generator Settings will be visible. Here you can adjust the kVp, mAs, and Focal Size the system will use for this shot and size. To copy the generator settings to all the sizes of this shot, press the Copy to All Sizes button.
The generator must be powered On for this section to be enabled.
Saving
Press the Save button to save your changes.
You must save these changes for them to take effect.