Overlay Editor
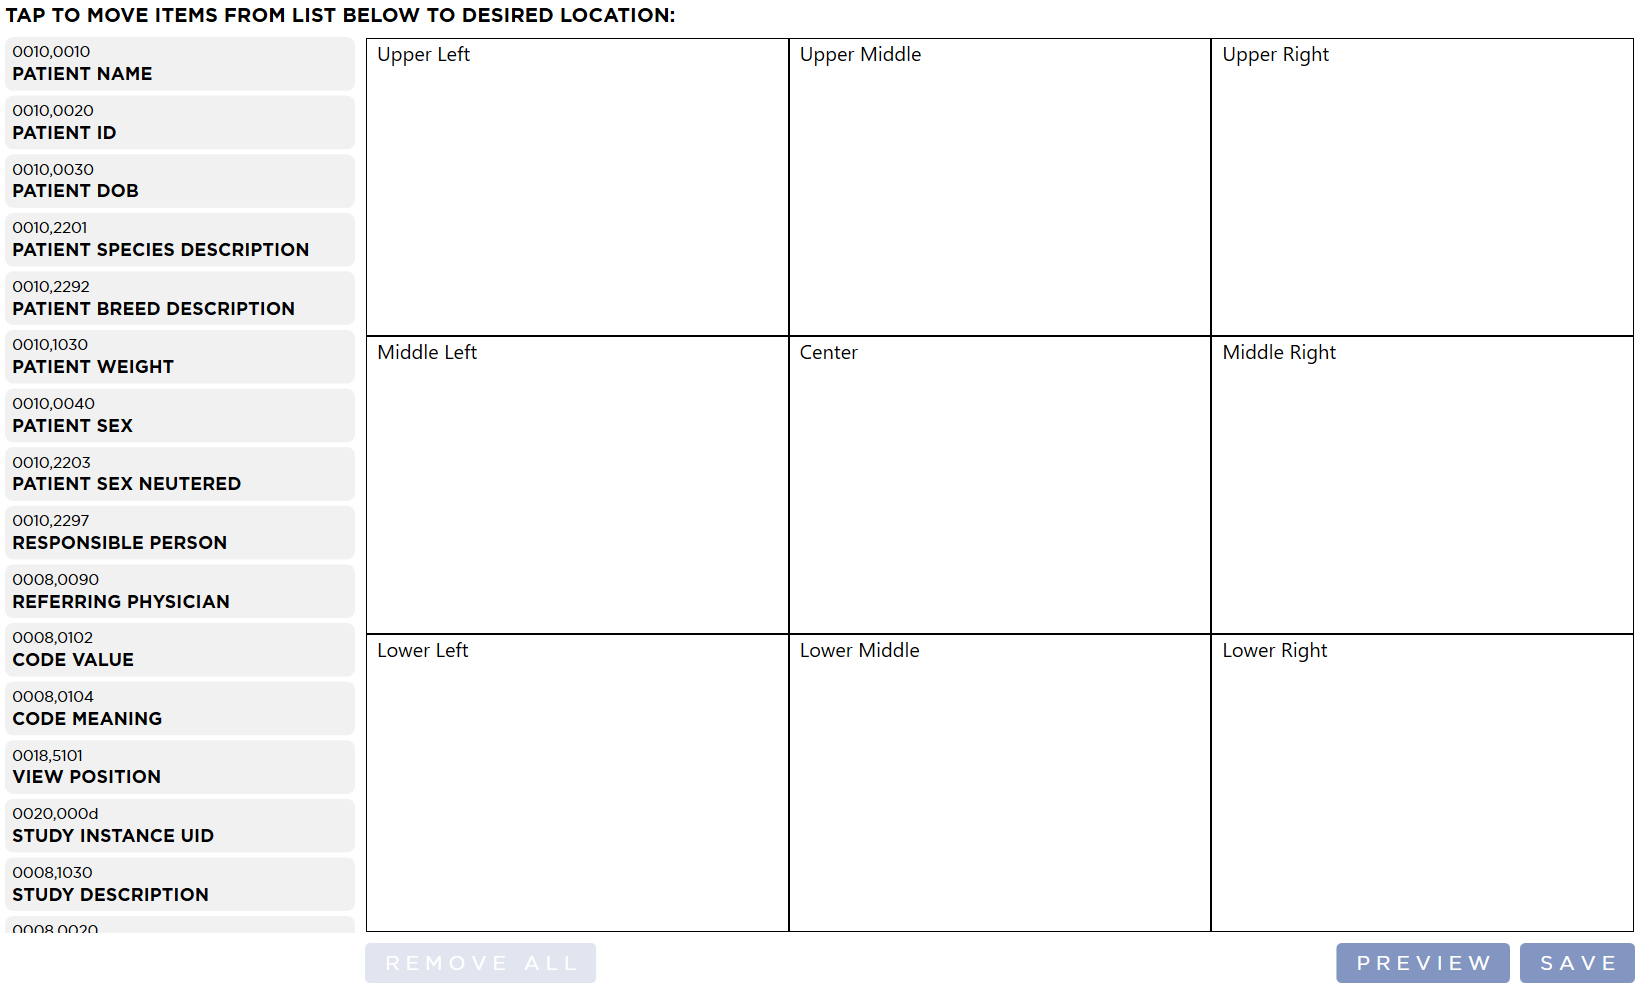
This is the Overlay Editor. Here you can layout the DICOM Tags you would like displayed in the image overlay. When you are finished editing the Overlays, press the Save button to save your changes.
Adding Tags
Tap one of the tags from the list on the left side. Tap on the Section you would like the tag to be displayed in.
Tag Display Properties
After you have added a tag to the grid, you are able to change it's display properties. To edit how a tag is displayed, right click or long press the tag. This will show the Overlay Item Edit form.
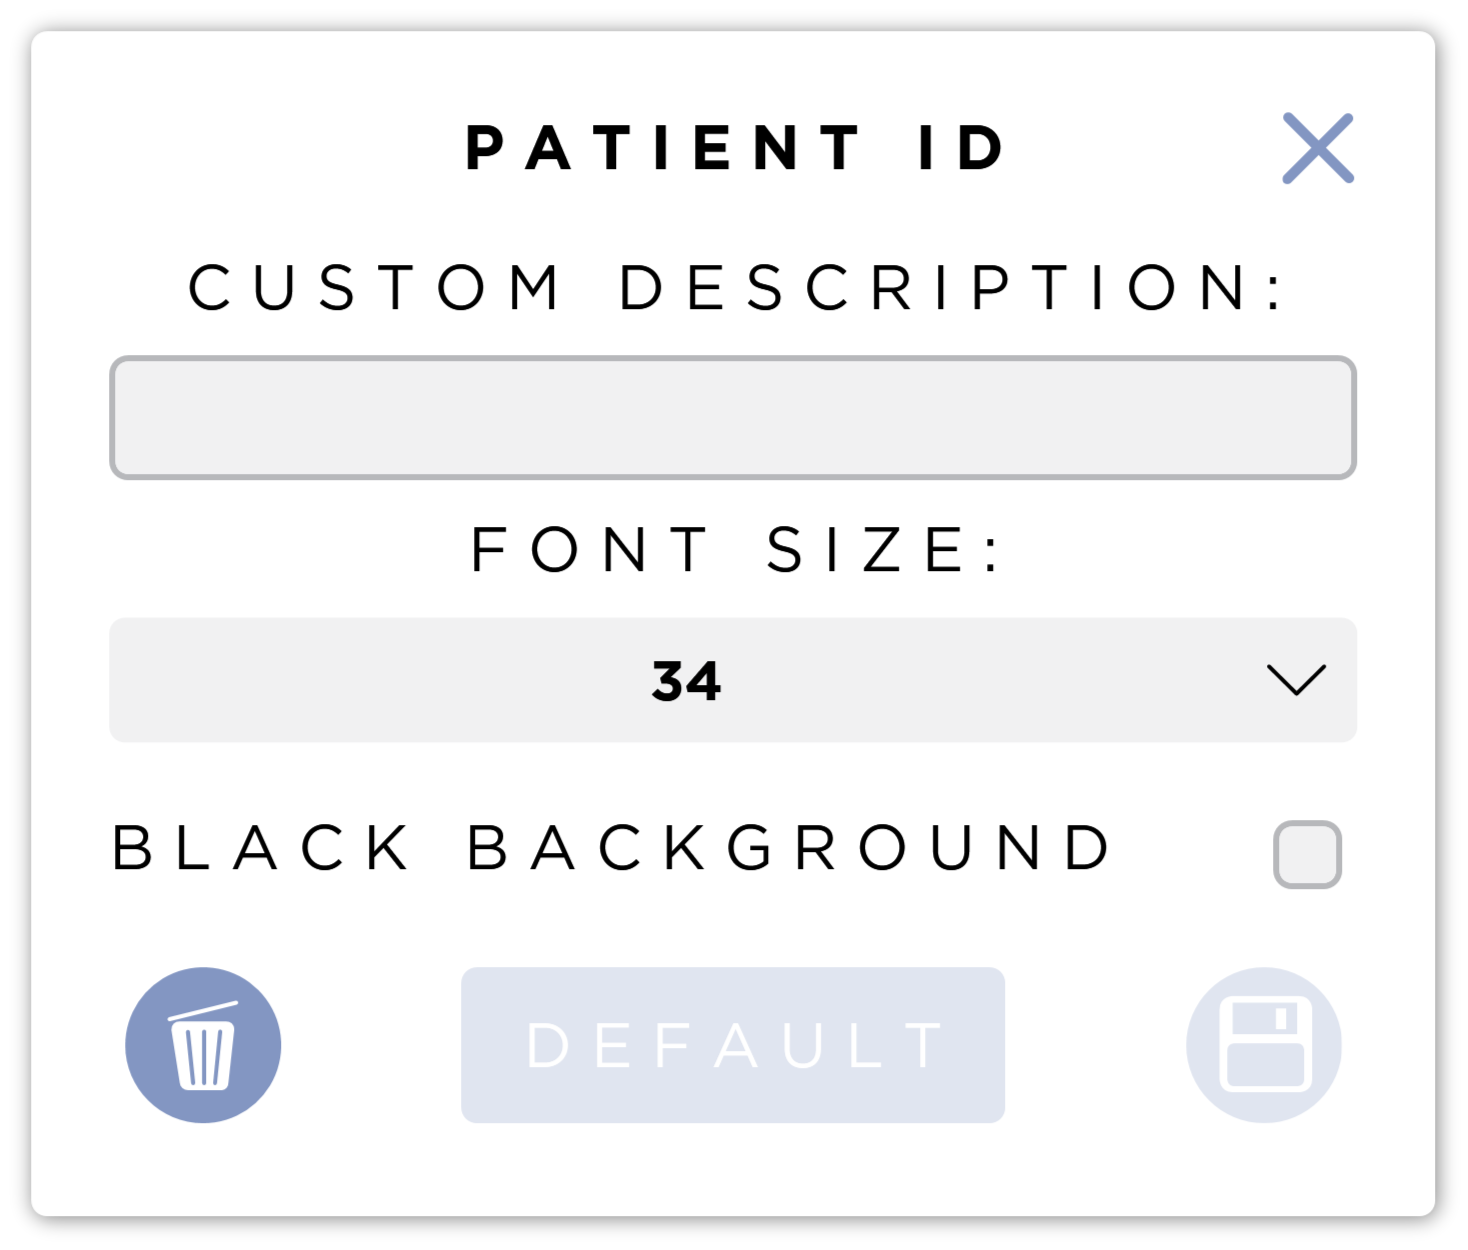
From here you can add a Custom Description to the overlay. This will prepend the Tag value.
For example, with the tag Patient ID, if a Custom Description of PID is used, for a patient with Patient ID 1234 the overlay will be displayed as PID 1234.
Font size can be adjusted as well by selecting a font size from the dropdown.
All overlays are displayed in white text. This may cause a problem if the image contains mostly anatomy in the area where you wish to see the overlay. When the Black Background checkbox is checked, the overlay will have a black background making it much easier to read.
To reset the display of the overlay to the default settings, press the Default button.
To discard your changes and dismiss the form press the X button in the top right corner.

You can delete the overlay by pressing the Delete button. This will close the form and remove the tag from the grid.

To accept the changes you have made to the overlay press the Save button.
The save button will only be active if changes have been made to the tag.
Removing Tags
Tags can be deleted individually with the Overlay Item Edit Form. However, if you have many tags applied, you may wish to remove all of them to start with a clean slate. Press the Remove All button to do this.
Preview
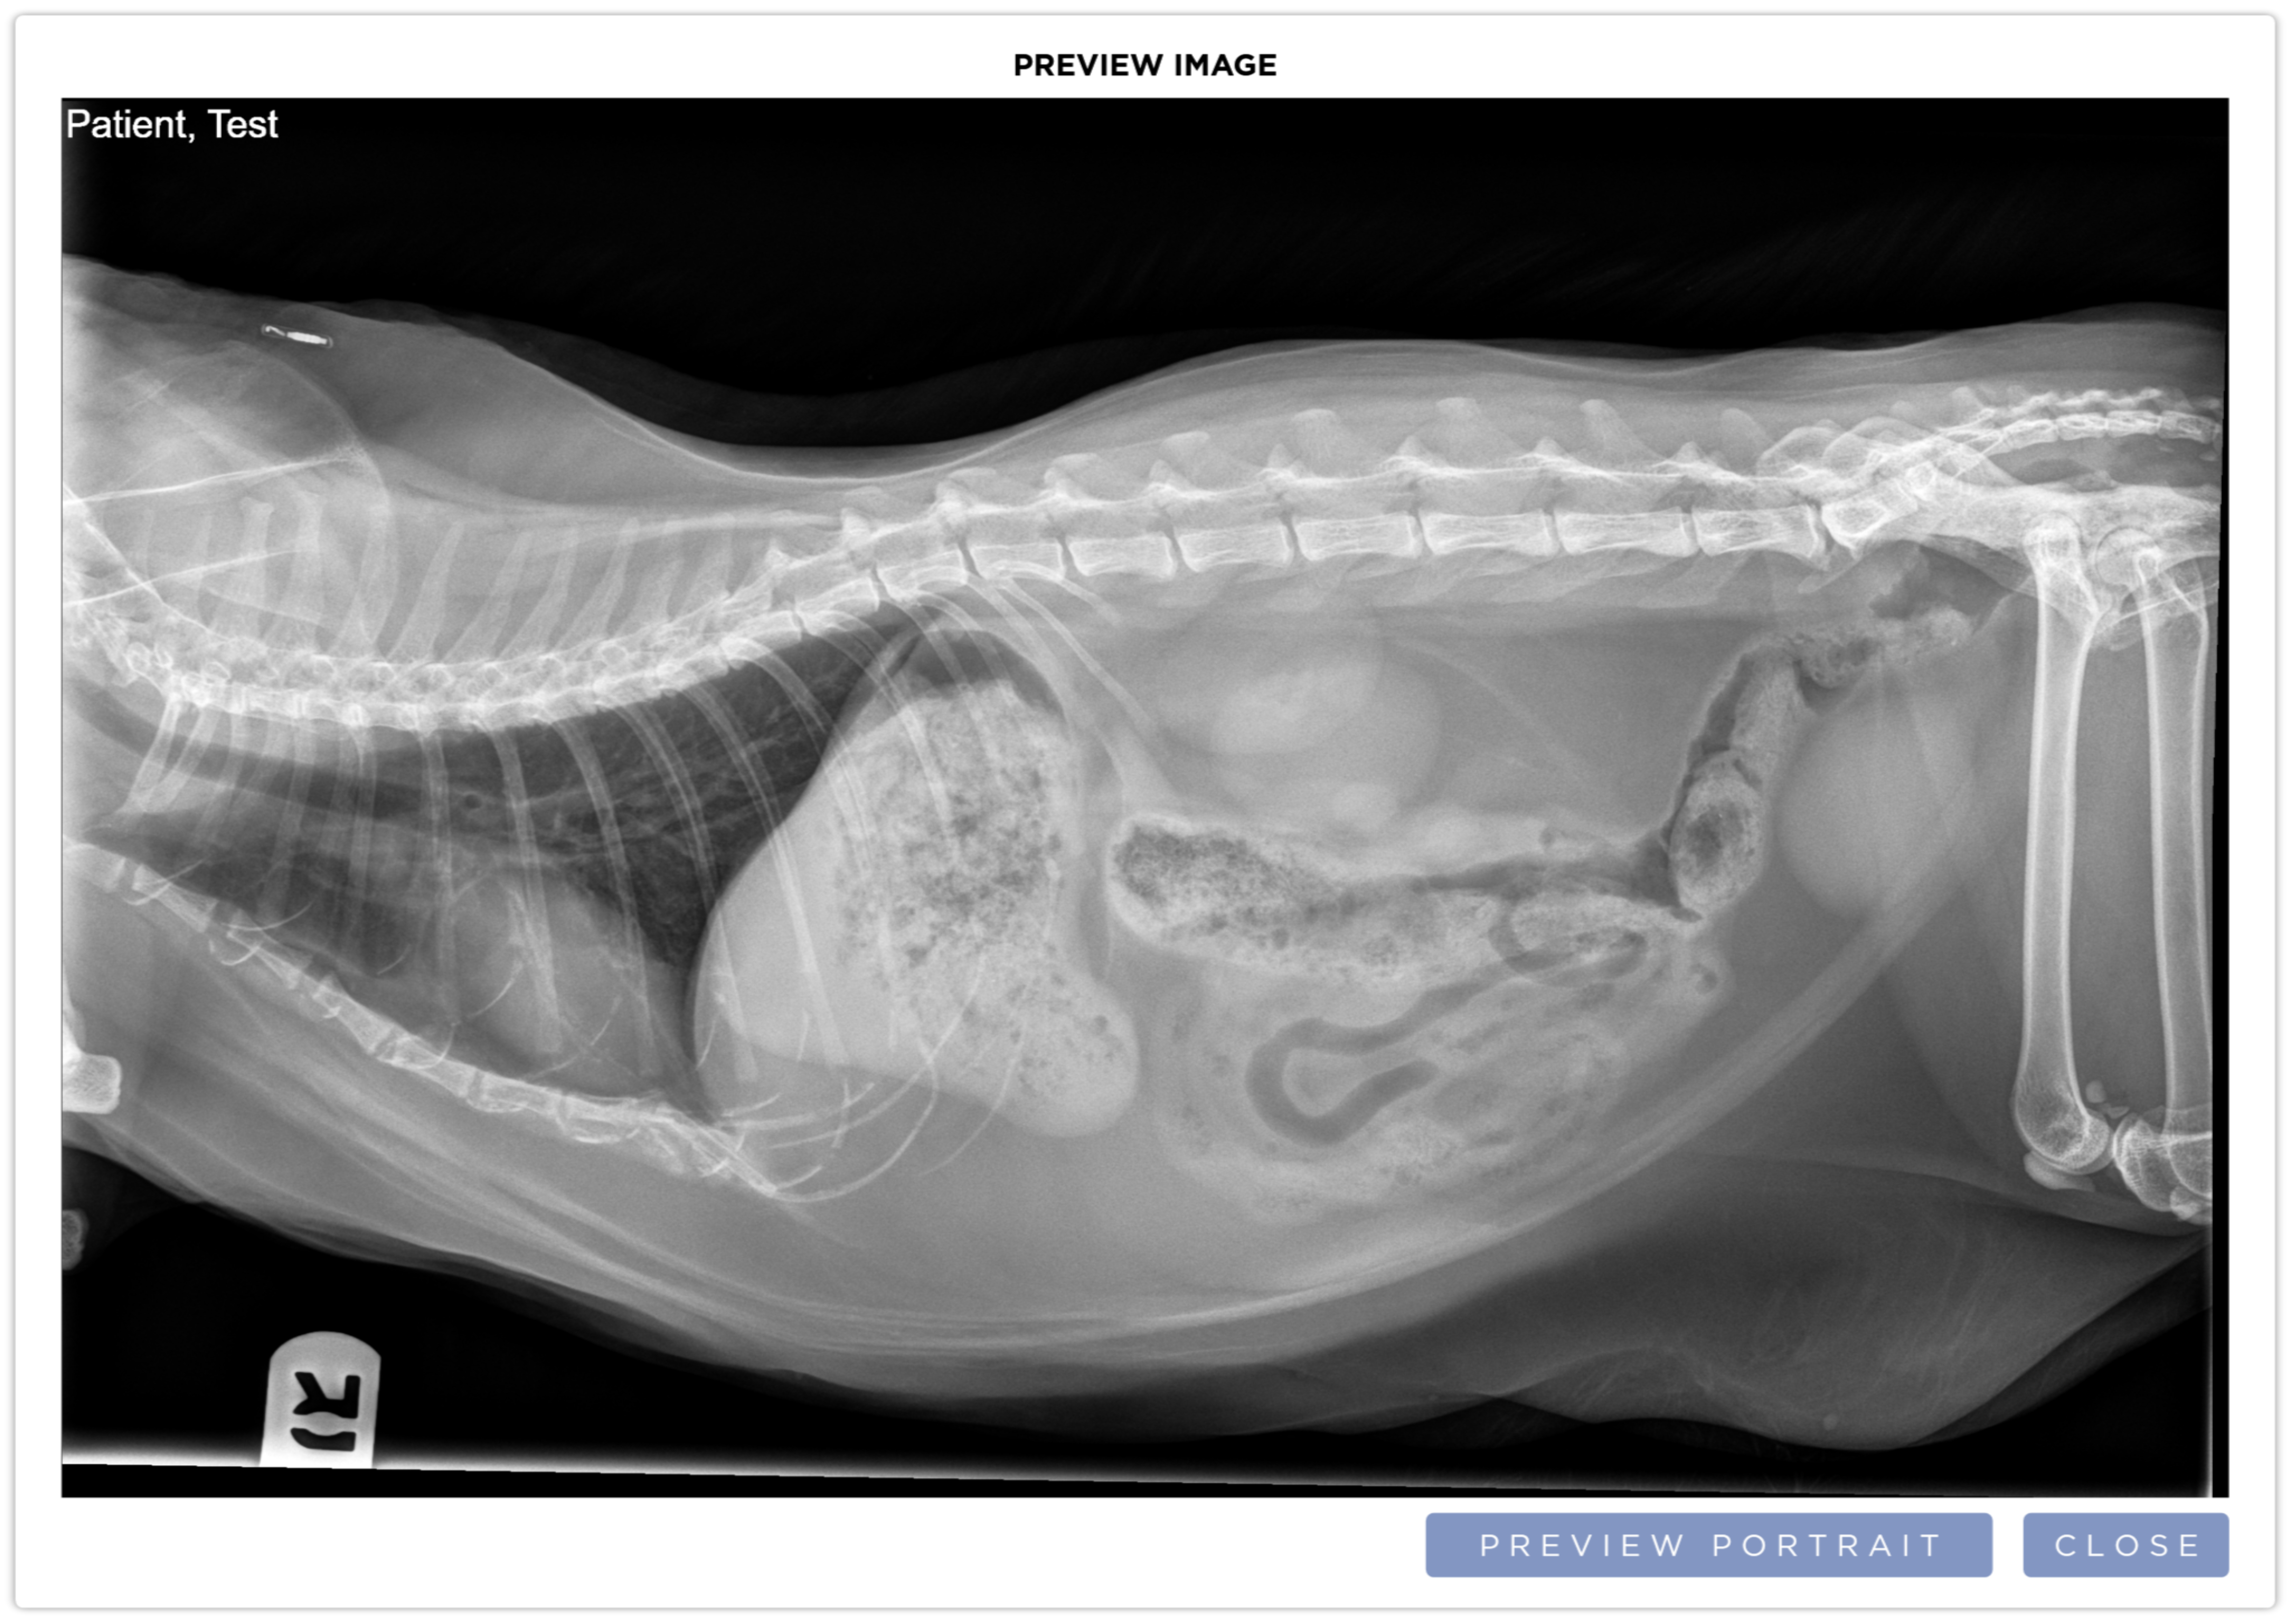
To see a preview of how the overlays will look on the final image, press the Preview button. This will display the Preview Image popup. The image will have the overlay applied to it. By default the image is one best suited for landscape. Press the Preview Portrait to see an image in that orientation. To close the preview popup, press the Close button.
If the Default Species option is set to Equine, equine specific images are used for the previews.