Fusion
You can cancel the Detector Registration by pressing the X in the upper right hand corner of the dialog.
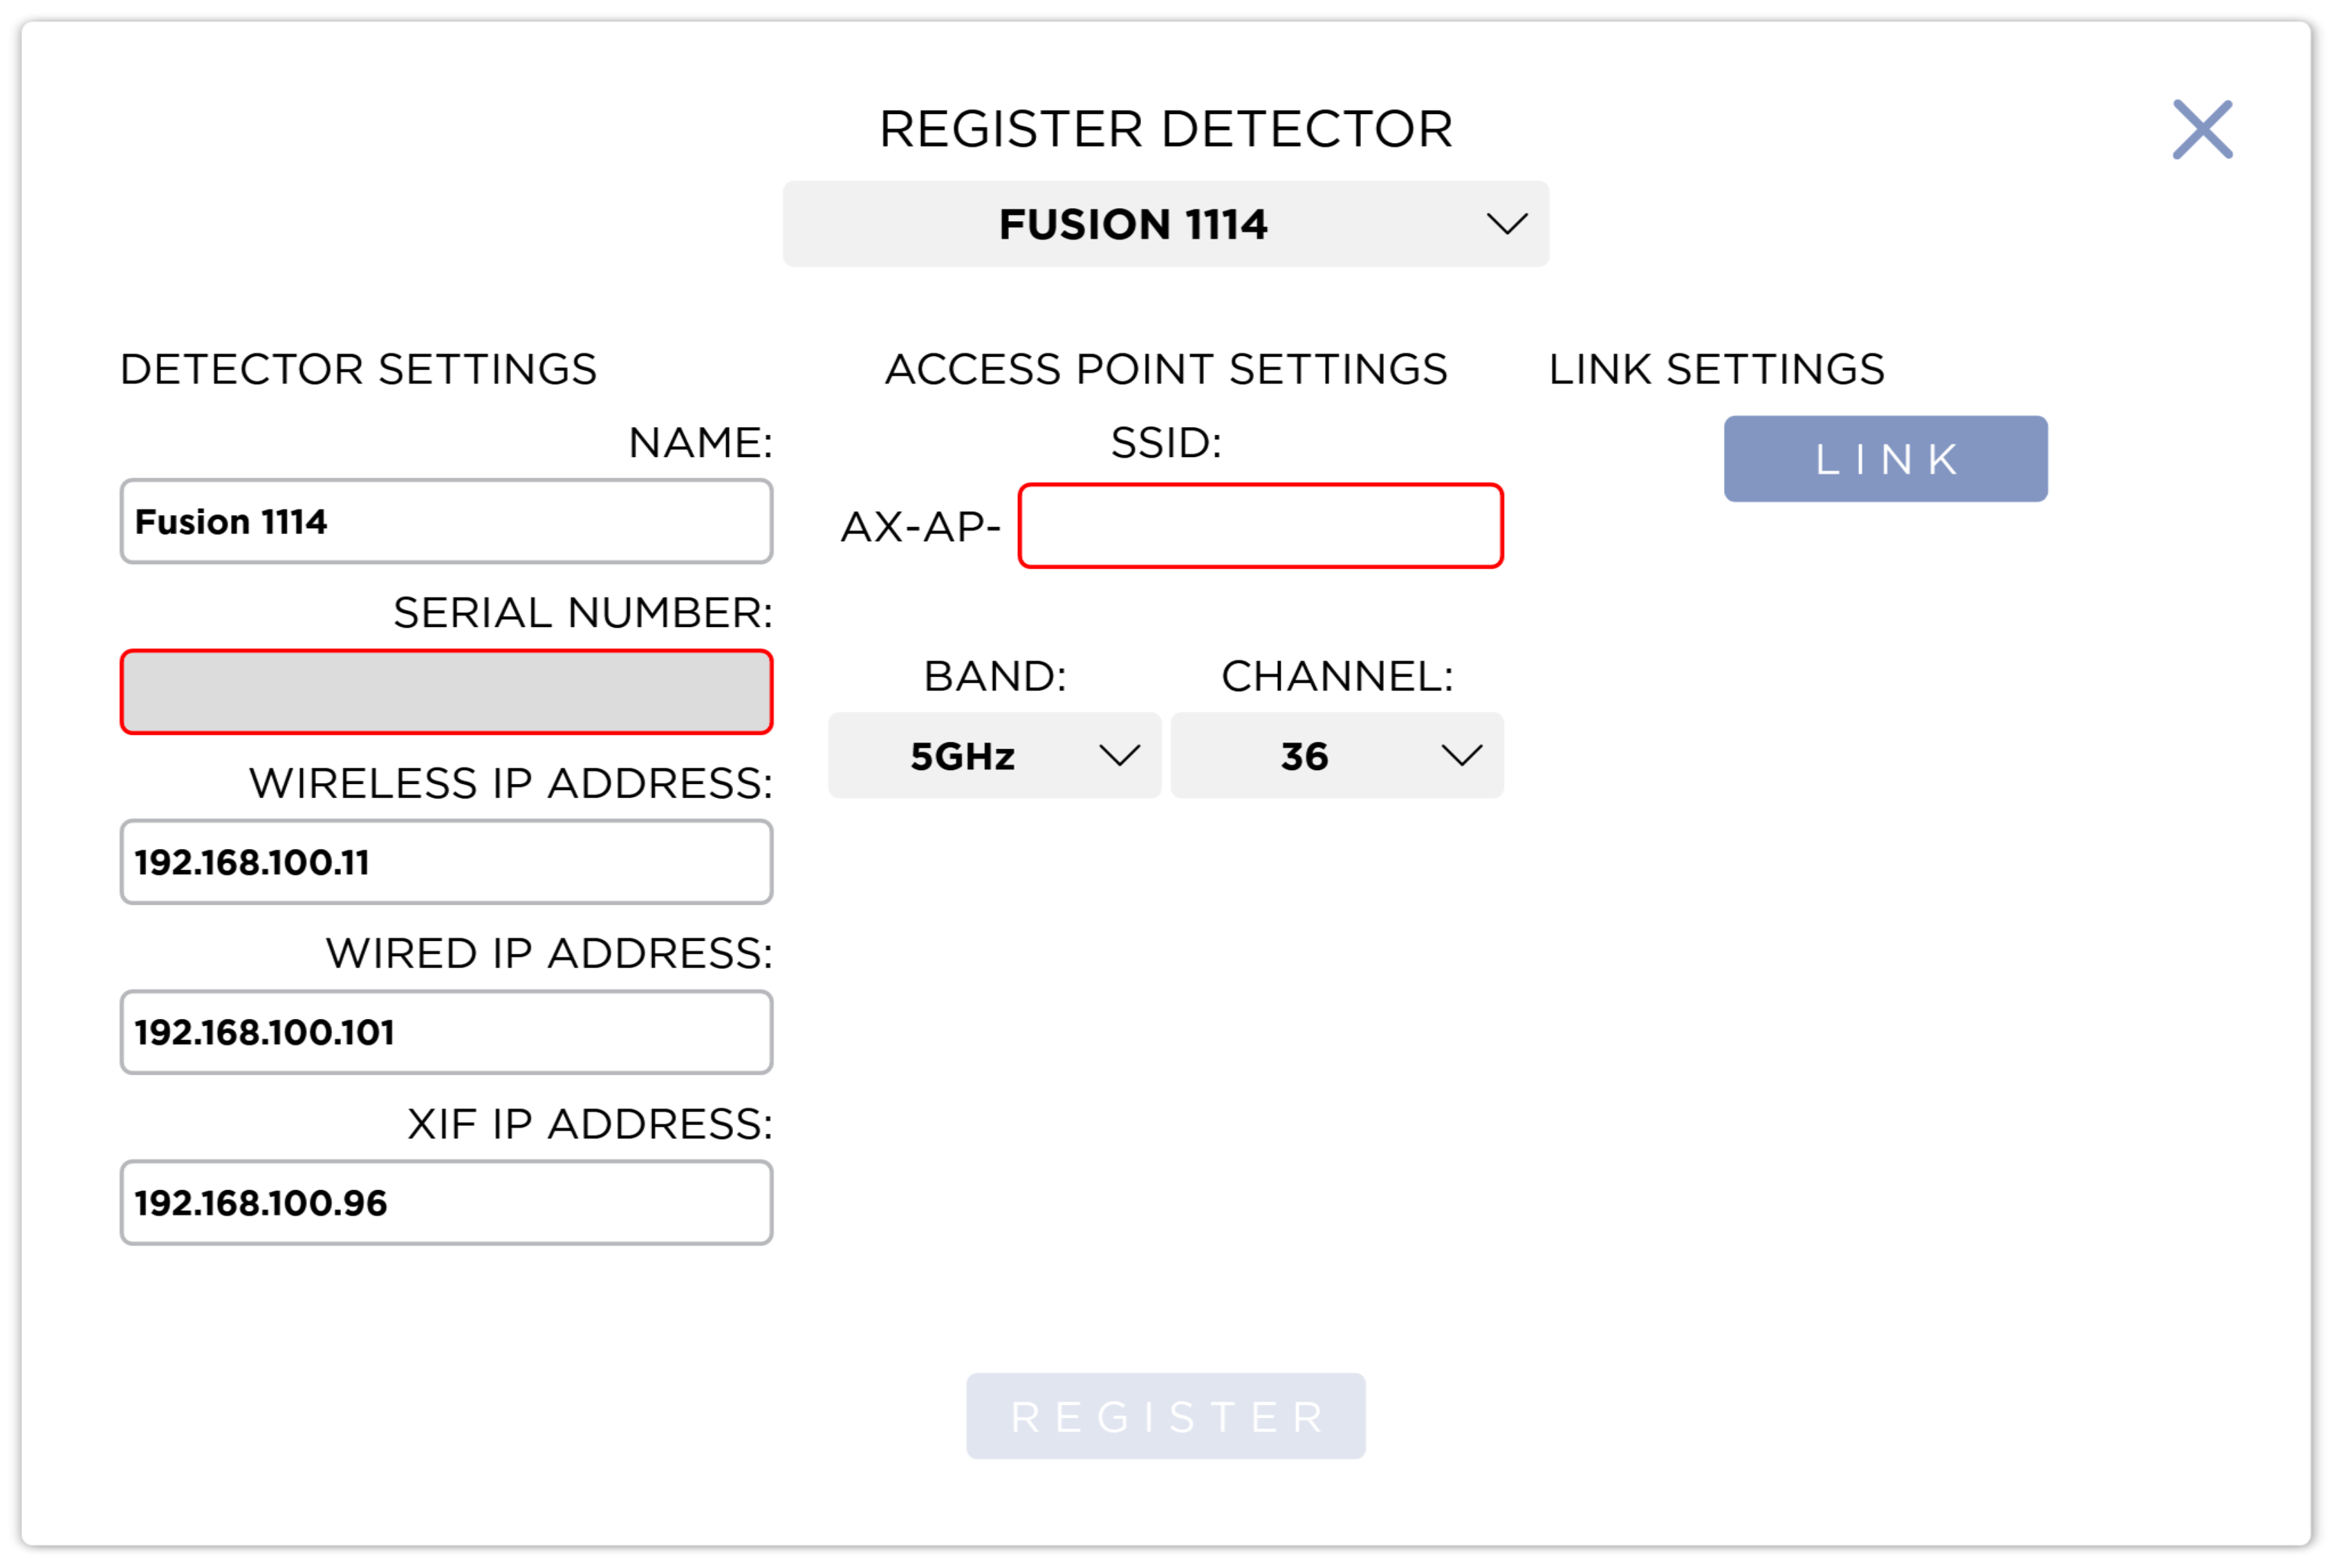
Detector Settings
Name
This is used to identify the Detector to the users.
Serial Number
This is the Serial Number of the Detector. This is a read only field and will be automatically populated when you Link the Detector.
Wireless IP Address
This is the IP Address the Detector will use for it's wireless interface.
Wired IP Address
This is the IP Address the Detector will use for it's wired interface.
Access Point Settings
SSID
This is the name of the SSID the Detector will broadcast when in wireless mode. The SSID will always have the AX-AP- prefix applied to it.
This field is required and can be no longer than 32 characters.
Band
This is the Wireless Band the Detector will use for it's wireless broadcast. You can select 2.4 or 5Ghz.
Channel
This is where you can select the Channel for the Detector's Access Point.
Linking
The Linking process sets up the Detector to connect to SmartDR Fusion. It will set up the Wireless Access Point to Broadcast the SSID on the Band and Channel selected. It will also set the Detectors Wired and Wireless IP addresses. Linking a Detector is also how the Detector's Serial Number is entered into the Registration Form. The Link button will be active only when a valid SSID has been entered.
You must Link to the panel before you can Register the panel.
Wired
When using this type of Link, you must have the Detector connected to the Fusion Multi Box. The Fusion Multi Box should be connected to the Wired Detector Interface. The Wired Detector Interface should have a Static IP Address of 192.168.100.9.
Enter in an SSID for the Detector and select the Band and Channel. Set the Port to Indicator/Wired. Press the Link button. The system will show the Link Dialog and will begin initializing the link.

Wait until the Link has completed it's initialization.

Connect the Detector to the Multi Box. This will automatically start the linking process. When the linking process is complete, the dialog will automatically close.

The Serial Number field should now be populated with the Detectors Serial Number. The Detector will also begin broadcasting it's SSID.
Wireless
Note this option is not available for V2 detectors. Please use the Bluetooth method.
When using this type of Link you will use the Ready Indicator or a ACTiSYS IR Dongle. The Detector will need to be Powered on. The Permanent Local Area Connection Interface should have a Static IP Address of 192.168.100.10.
Enter in an SSID for the Detector and select the Band and Channel. When using the Ready Indicator, set the Port to Indicator/Wired. When using a ACTiSYS IR Dongle, set the Port to the COM Port for the Dongle. Press the Link button. The system will show the Link Dialog and will begin initializing the link.
Wait until the Link has completed it's initialization.
Align the Ready Indicator's IR Port or the ACTiSYS IR Dongle's IR Port with the Detector's IR Port. Tap the Detector's Power button once. This will automatically start the linking process. When the linking process is complete, the dialog will automatically close.
The Serial Number field should now be populated with the Detectors Serial Number. The Detector will also begin broadcasting it's SSID.
Bluetooth
This option is only available with V2 detectors.
Enter in an SSID for the Detector and select the Band and Channel. When using the Ready Indicator, set the Port to Indicator/Wired. When using a ACTiSYS IR Dongle, set the Port to the COM Port for the Dongle. Press the Link button. The system will show the Link Dialog and will begin initializing the link.
Wait until the Link has completed it's initialization.
Bring the detector very close to the Acquisition PC and press the link button on the detector.
The Serial Number field should now be populated with the Detectors Serial Number. The Detector will also begin broadcasting it's SSID.
Register
The Register button is disabled until the Detector has been linked with the system.
Pressing the Register button will show the Detector Registration Dialog and start the registration process.
The process will start by saving the Detector to the Database. This will also set the detector to the Active Detector.

The the system will Initialize the Detector Service.

Once the Detector has been initialized, the registration process is complete.

Press the Close button to close the Dialog.
As of SmartDR Fusion 2.2, registration of a wireless Detector no longer requires manually connecting the Permanent Local Area Connection Wi-Fi adapter to the detector's SSID. SmartDR Fusion now automatically changes the Wi-Fi profile to connect to the detector.